Category: DIY

  • Origami 101

    What is Origami?

    Origami does not originate from a sole inventor, it was crafted over centuries by many different hands for various ceremonial purposes in Japan and even China (Robinson, 2026). The word we use today, origami, is derived from the Japanese words ori which means folded and kami which translates to paper. While paper itself was first developed in China before spreading to Japan, folding paper into decorative and symbolic forms became especially refined in Japanese culture over time. Early uses of folded paper included religious ceremonies, gift wrapping, and formal exchanges, where presentation held great meaning.

    Fast forwarding centuries, today origami is seen worldwide. A simple YouTube search nowadays can teach even the newest of the new how to craft an origami chameleon, like how I learnt! What was once a traditional practice has now grown into a global hobby, mathematical practice, and even an area of scientific research.


    Math, Science, and Folds

    It comes to no surprise when we see the intricate works by masterful artists, that the art within folding comes from mathematical roots. For example, take the common fold that basically all origami pieces start with: the square piece of paper folded diagonally corner to corner and then along the sides, top to bottom and left to right. These folds create lines of symmetry and reference points that help guide more intricate folds later on. Mathematically, these folds create either a valley or mountain based on the value of the angle between the two adjacent planes created by the fold (Kunz, 2024). A valley fold bends inward like a “V,” while a mountain fold rises outward like a mountain. By combining these two simple fold types in different orders, locations, and sizes, folders can create highly detailed animals, flowers, and geometric structures. 

    Additionally, origami also has strong roots in more of a geometric application of math, with many models and folds often relying on fractions, bisectors, symmetry and so much more. In the scientific world, origami has received its share of the spotlight from inspiring compact folded solar panel designs for satellite use to shaping medical stents used in patients. 


    My Folds and Why I do it

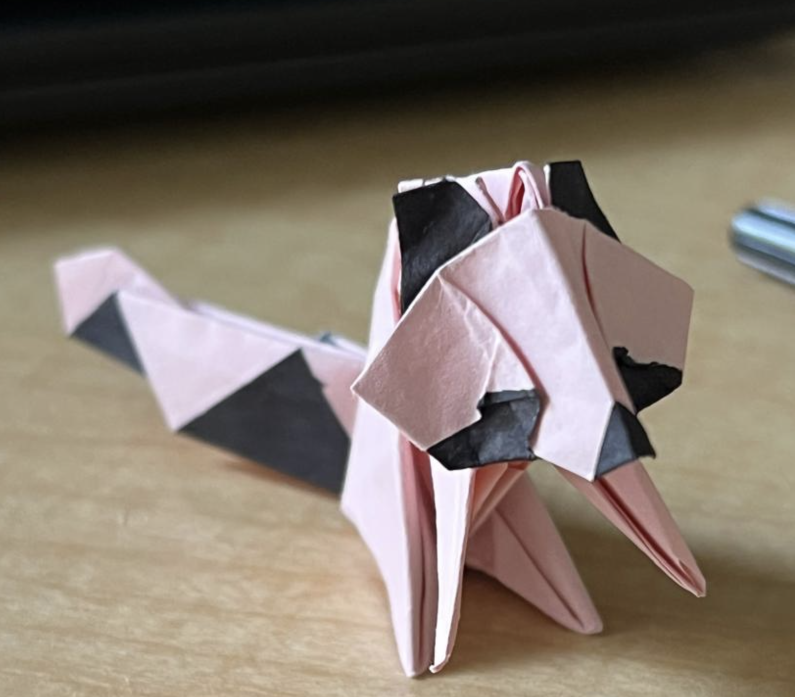
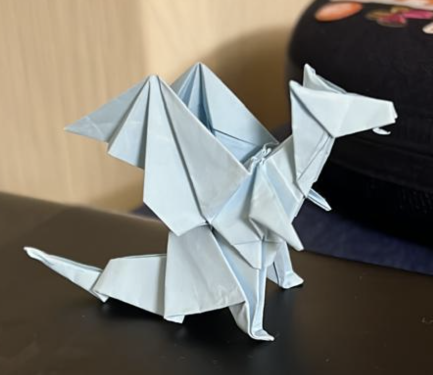
    My goal when folding is simple: just don’t make it ugly. I find my inspiration, to recreate art through online tutorials, to be fueled by the passion and creativity of others. I folded the blue origami dragon below to surprise one friend, and the raccoon for another. I trace my folding skills back to one main motivation: wanting my creations to be as perfect as possible for the people around me. I have made plenty of lousy folds, but never when I feel a real sense of purpose behind them. When I fold for someone else, I tend to care more, focus more, and try as hard as I can. I am happy to say I will keep carrying on origami traditions. Mine may not be embedded in ceremonial, mathematical or even scientific purposes, but they still come from a place of creativity, curiosity, and humanity.

    References

    Origami created and photographed by Kristina Siju

    Origami with Jo Nakashima. (2021, September 14). ORIGAMI CHAMELEON (Jo Nakashima ). YouTube. https://www.youtube.com/watch?v=if7iSuzNn38

    Nakashima, J. (2015). Origami Dragon (Jo Nakashima) [YouTube Video]. In YouTube. https://www.youtube.com/watch?v=kUsxMXwCW8A

    Muneji Fuchimoto ORIGAMI CHANNEL. (2020, December 8). 「折り紙」アライグマ(racoon origami)の折り方. YouTube. https://www.youtube.com/watch?v=X2FYuvt-U80

    Geometry – Ancient geometry: abstract and applied. (n.d.). Encyclopedia Britannica. https://www.britannica.com/science/geometry/Ancient-geometry-abstract-and-applied

    Thesis, B., Kunz, C., & Cannas Da Silva, A. (2024). Mathematics of Origami. https://people.math.ethz.ch/~acannas/Student_Papers/BSc_Theses/2024_bsc_kunz_mathematics_of_origami.pdf

  • Origami & Bio-inspired Design

    You’ve probably seen pictures of origami before, or even folded some yourself! Origami is an ancient art form that originated in China in the 2nd century AD. It made its way to Japan around the 6th century, where it became an art for both recreation & decorating shrines. In the centuries since, it’s evolved into a complicated craft that produces beautiful art from a very simple medium—a single sheet of square paper. What you might not realize, however, is how closely origami is linked with science and math.

    The Mathematical Basis of Origami

    Whenever you fold a piece of paper, you’re performing an action that’s incredibly mathematical. The rules of geometry govern origami, and you can describe all possible folds in six axioms. These axioms tell you what kinds of geometric constructions & proofs are possible with origami and can be used to determine if a set of folds is even physically possible. If you want to learn more about these axioms, check out this webpage by origamist Robert J. Lang!

    Bio-inspired design is an interdisciplinary approach to design that takes inspiration from nature to design new technologies. You can combine the mathematical principles of origami with bio-inspired design to create novel robot inventions. Today, we’ll go through a few examples that span a wide spectrum of species!

    Worms, Snakes, and Other Slithery Ones

    Engineers are currently trying to develop better rescue robots that can navigate complex terrain. Worms, snakes, and other slithering & slinking creatures cross crazy (relative to them) terrain on a day-to-day basis, and are a great source of inspiration for scientists.

    Some robotics labs have taken inspiration from the movements of snakes, and have created robot origami snakes that slither around and replicate the moving patterns of their natural counterparts. These multi-segment robot prototypes have a versatile range of movement.

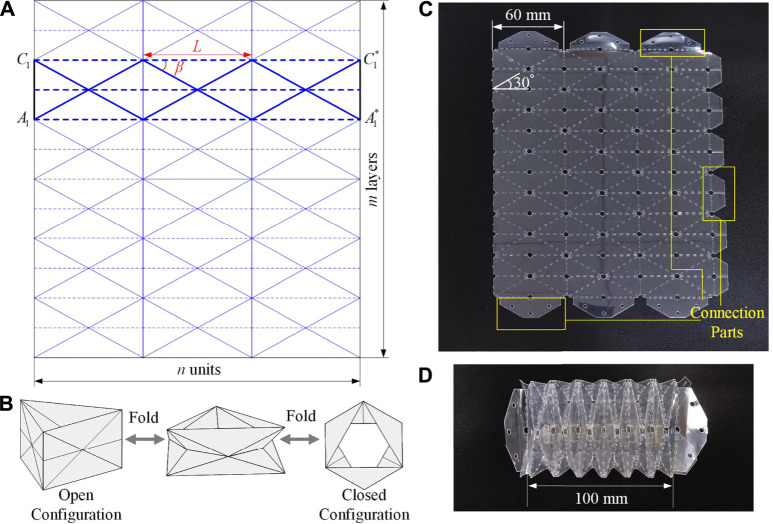
    Other labs have also mimicked the slinking movement of worms! Each of the segments in these worm-bots is made up of Yoshimura-Ori folds. You can see the crease pattern below in (A) of figure 1. The Yoshimura-Ori fold is a series of repeating triangles that can be collapsed into a cylindrical structure. They can be folded into an “open” or “closed” configuration which determines how compressed the unit is. A sequence of these folds is highly compressible & deformable while still maintaining its rigidity. It allows for a wide range of motion, which you can see in figure 2 of the movement of an earthworm inspired robot.

    Creaese diagram for yoshimura-ori folds, with diagrams of it expanded/contracted.
    Figure 1. Crease pattern of yoshimura-ori earthworm robot
    sequence of diagrams and photos showing the degree of motion of the worm robot
    Figure 2. Range of motion of yoshimura-ori folds

    The Yoshimura-ori structure allows the robot to mimic both the crawling motion that earthworms take as well as sharp directional turns. This technique holds a lot of promise for the future of all-terrain robots!

    Jellyfish & Aquatic Robots

    The land isn’t the only place origami is impacting robotics. The undulating motions that jellyfish swim with are both pretty and inspire researchers to develop new modes of underwater movement.

    Jellyfish are a type of organism called a medusa, which means that their body is umbrella shaped. Medusae are recognized to be the earliest multicellular organisms to have evolved muscular swimming, and while jellyfish generally float along ocean currents wherever they might go, they can use their hydrostatic skeleton to control vertical movement in a pinch. Prolate (long) medusae use jet propulsion to rapidly accelerate and avoid predators.

    They do this by contracting a water pouch in their bodies. The water expelled propels them in the opposite direction. They then expand their pouch and fill it with water again, ready to repeat for another burst of movement.

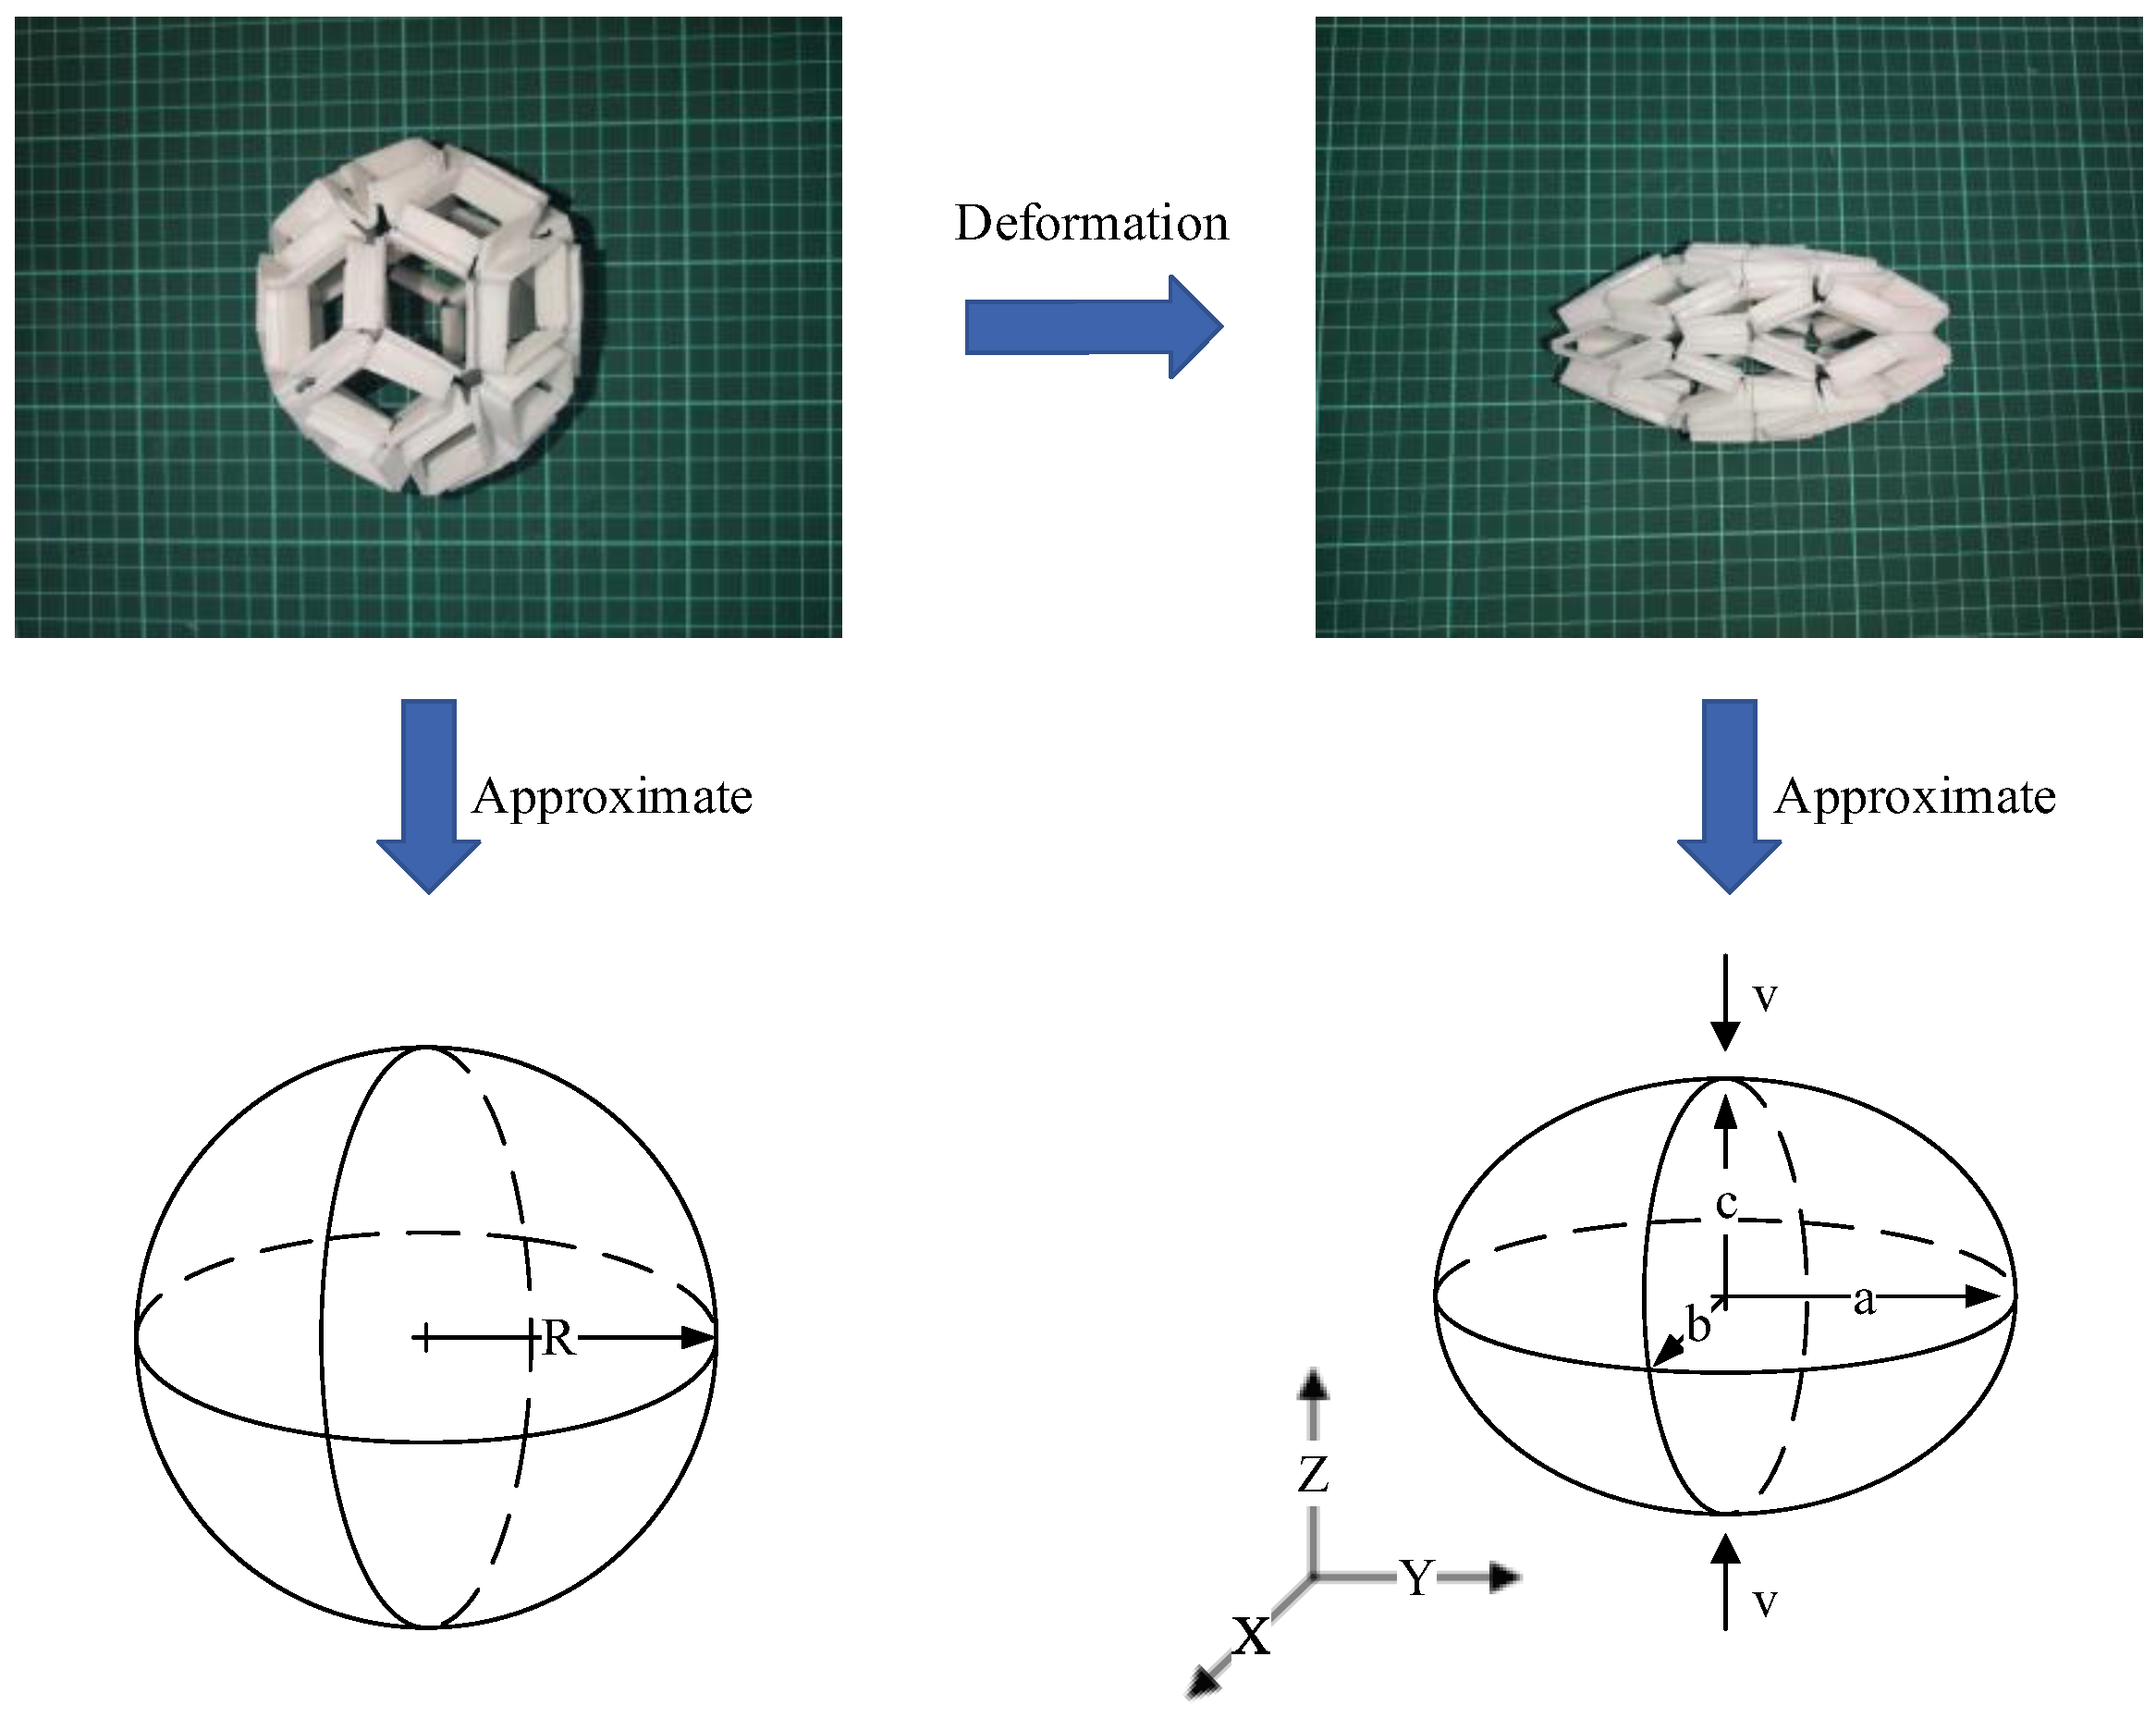
    Researchers are attempting to mimic this motion by combining soft-body robotics and origami engineering. The idea is that by creating a flexible origami polyhedral (a flexiball) they can motorize it in the same way medusae use jet propulsion underwater. The resulting flexiball they went with is known as a rhombic triacontahedron, and has 30 faces.

    Below is a picture of their 3D printed flexiball and how it changes shape after contraction.

    a before and after image of a 3d printed flexible triacontahedron being deformed
    Figure 3. Rhombic triacontahedtron flexiball

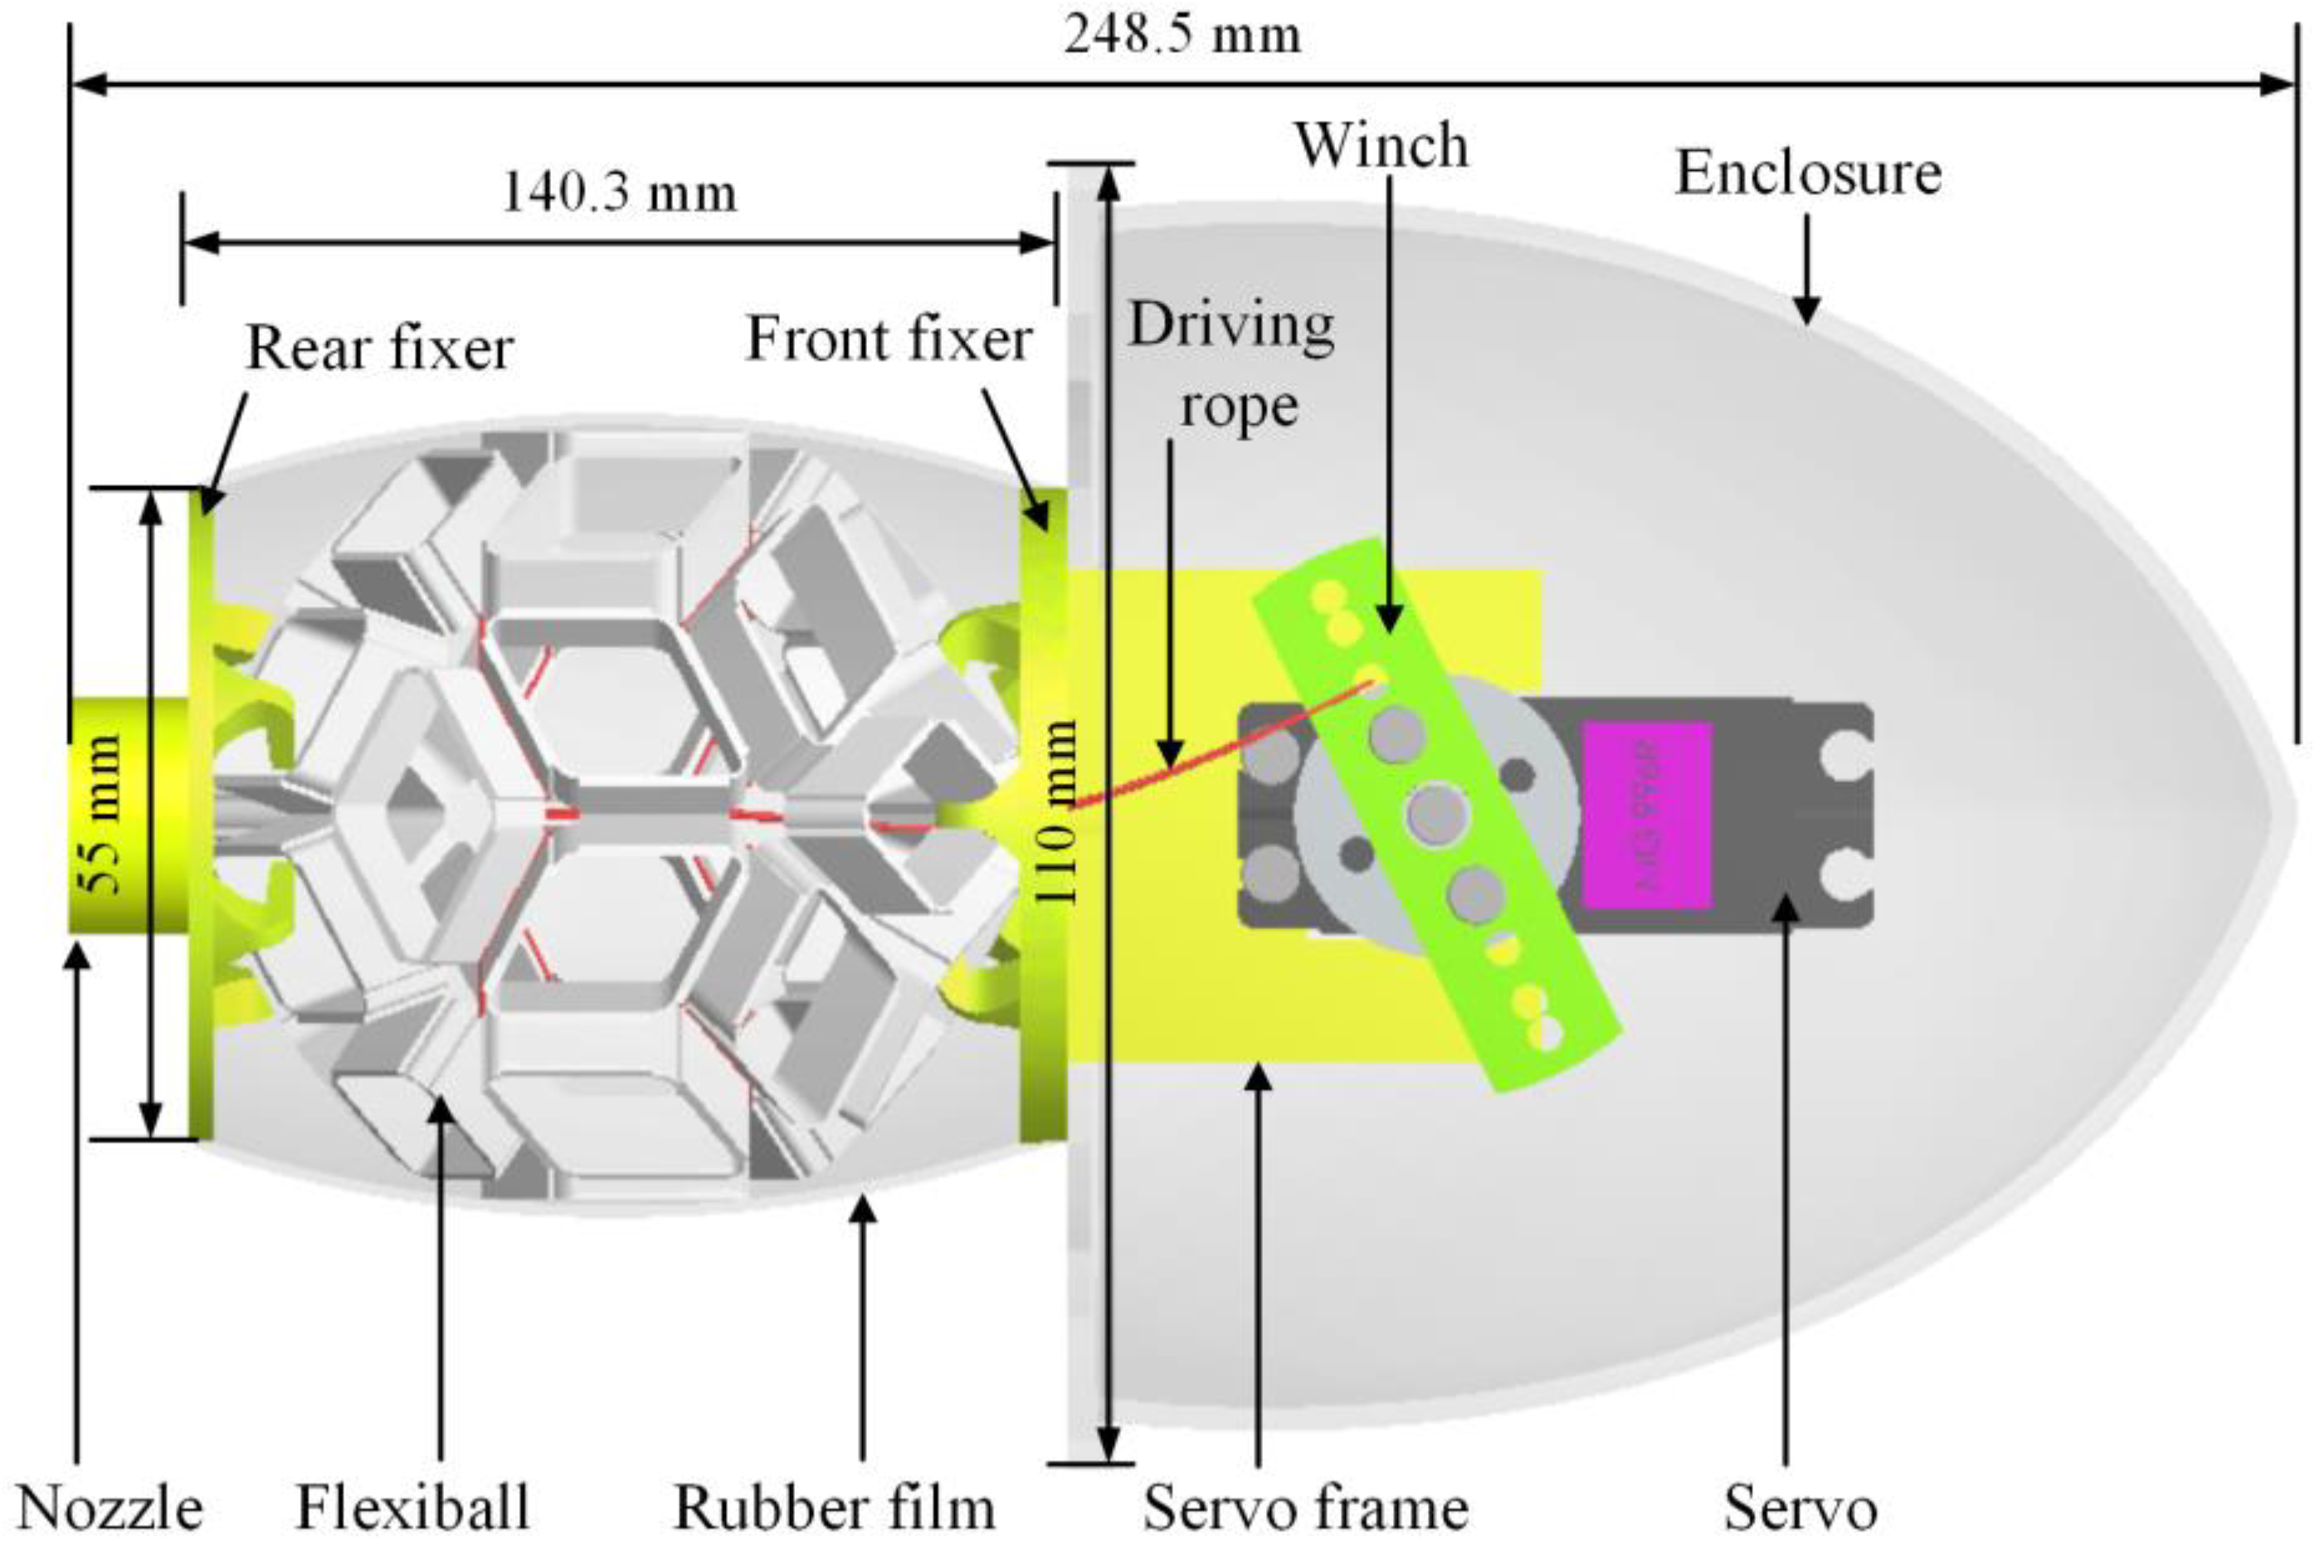
    The researchers then designed a lightweight, waterproof enclosure for the flexiball. The flexiball is contracted using three ropes connected to the grooves of the polyhedra’s edges.

    side profile diagram of jellyfish robot
    Figure 4. Side profile of jellyfish bot mechanisms

    Make your own!

    You don’t have to be an engineer to explore origami & science yourself! Try folding your own tessellation using the template below! Fold all the blue/dashed lines in one direction, and the red/dotted lines in the opposite direction.

    miura ori crease pattern
    Miura ori template! Try folding it yourself
    gif of miura ori fold expanding and contracting
    What your miura ori fold should do!


    Sources:

    Hu et al., “An Origami Flexiball-Inspired Soft Robotic Jellyfish.”

    Qiu et al., “Design and parameter optimization of a biomimetic jellyfish origami mechanism (BJOM) based on waterbomb tessellation.”

    Luo et al., “OriSnake: Design, Fabrication, and Experimental Analysis of a 3-D Origami Snake Robot.”

    Zhang et al., “Yoshimura-origami Based Earthworm-like Robot With 3-dimensional Locomotion Capability.”

    Schroeder, et al., “An electric-eel-inspired soft power source from stacked hydrogels.”

    Miura-ori crease pattern & GIF from Wikipedia Commons

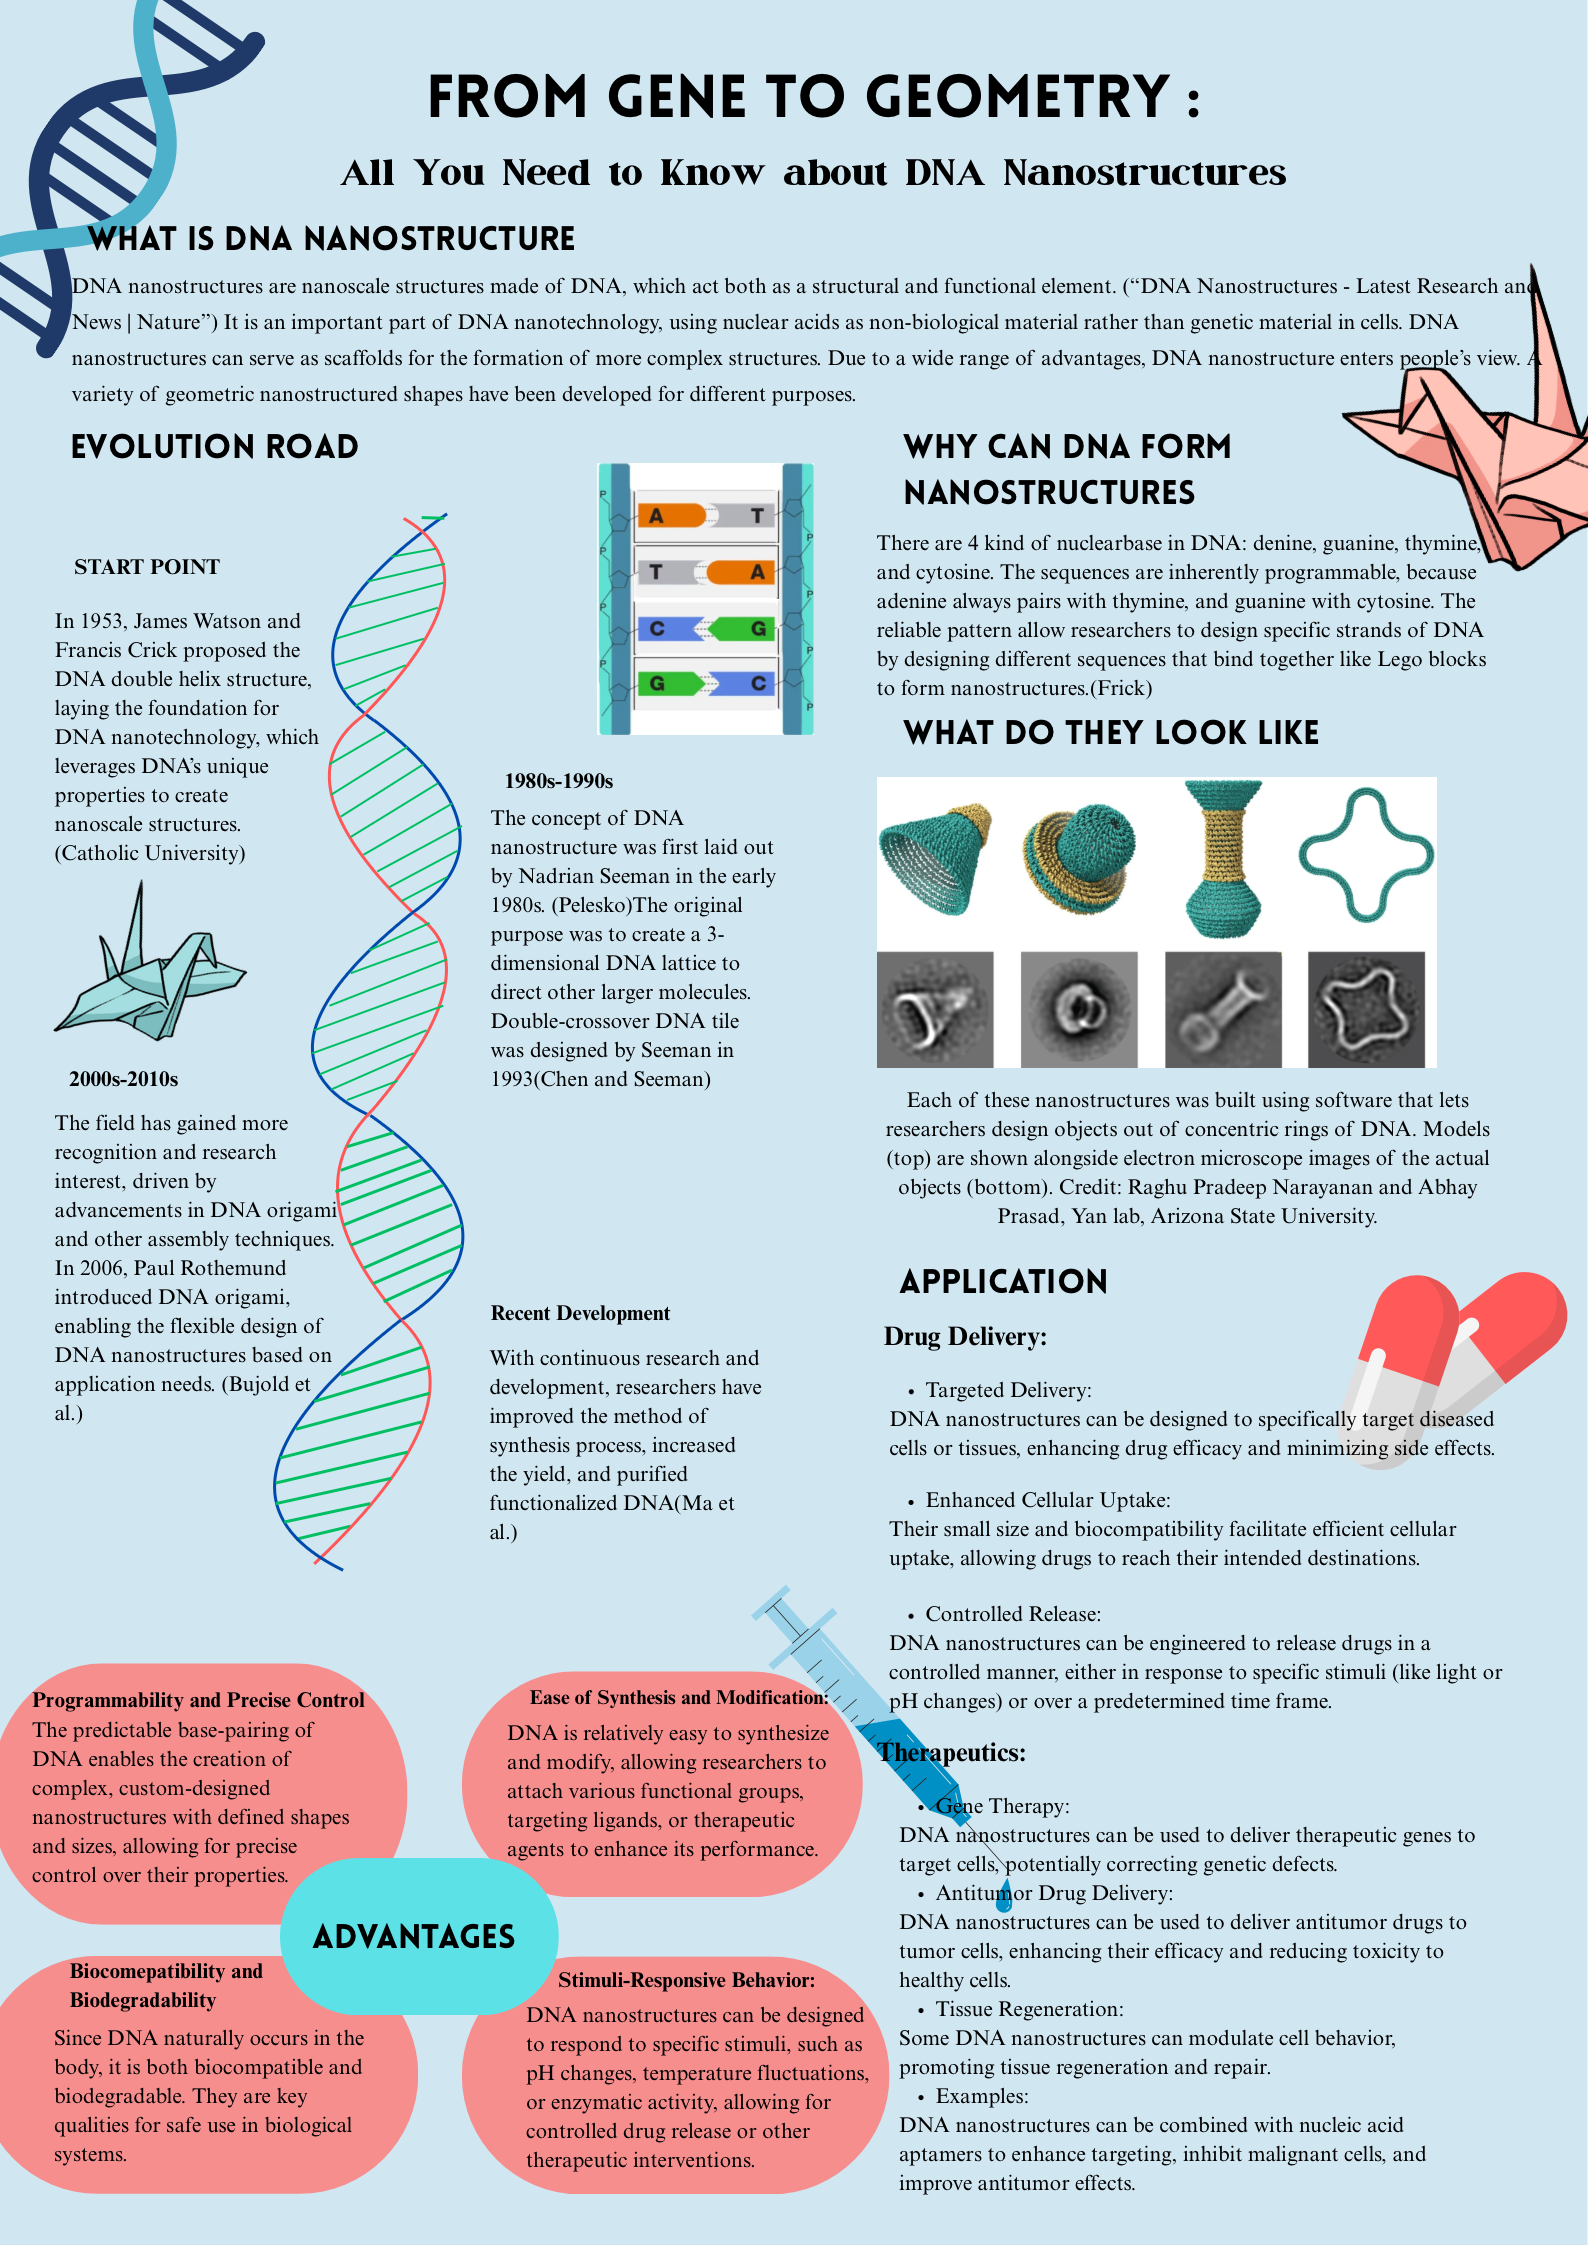
  • From Gene to Geometry : All You Need to Know about DNA Nanostructures

    Works Cited
    Bujold, Katherine E., et al. “DNA Nanostructures at the Interface with Biology.” Chem, vol. 4, no. 3, Mar. 2018, pp. 495–521, https://doi.org/10.1016/j.chempr.2018.02.005.
    Catholic University. “School of Engineering.” The Catholic University of America, 2024, engineering.catholic.edu/research-and-faculty/faculty-profiles/eecs/hieu-bui/buiresearch/a-brief-introduction-to-dna-nanotechnology.html.
    Chen, Junghuei, and Nadrian C. Seeman. “Synthesis from DNA of a Molecule with the Connectivity of a Cube.” Nature, vol. 350, no. 6319, 1 Apr. 1991, pp. 631–633, www.nature.com/articles/350631a0, https://doi.org/10.1038/350631a0.
    “DNA Nanostructures – Latest Research and News | Nature.” Nature.com, Nature, 13 Jan. 2025, www.nature.com/subjects/dna-nanostructures. Accessed 3 Apr. 2025.
    Frick, Erin. “The Shape of Molecules to Come: A Q&a on Designing DNA Nanostructures for Biomedical Applications.” Phys.org, 6 Aug. 2024, phys.org/news/2024-08-molecules-qa-dna-nanostructures-biomedical.html. Accessed 3 Apr. 2025.
    Ma, Wenjuan, et al. “The Biological Applications of DNA Nanomaterials: Current Challenges and Future Directions.” Signal Transduction and Targeted Therapy, vol. 6, no. 1, 8 Oct. 2021, pp. 1–28, www.nature.com/articles/s41392-021-00727-9, https://doi.org/10.1038/s41392-021-00727-9. Accessed 18 Nov. 2021.
    Pelesko, John A. Self Assembly. CRC Press, 21 May 2007.
    Seeman, Nadrian C. “Structural DNA Nanotechnology: An Overview.” Methods in Molecular Biology (Clifton, N.J.), vol. 303, no. 15923682, 2005, pp. 143–166, www.ncbi.nlm.nih.gov/pmc/articles/PMC3478330/, https://doi.org/10.1385/1-59259-901-X:143. Accessed 25 Feb. 2022.
  • How to Publish a HTML and JavaScript Game on GitHub

    Recently, I took part in the Atlanta Science Festival 2025 STEM edition. The STEMcomm VIP team organized a version of Scavenger Hunt, and I was part of the CyberQuest Team. I was responsible for the Scavenger Hunt game, which needed an online interactive site. I figure that GitHub Page is a good free platform to do this. However, GitHub Page has had quite a few updates in recent years and the guide sites have not updated accordingly. I spent quite some time trying to figure it out, and here I am wanting to share how I did it.

    In the past week I published an article about how to beat the popular 2048 game. You can take a look if you are interested!

    https://2026.chargedmag.org/2025/04/how-to-become-an-expert-at-2048/

    So, in this example, we are publishing a variant of 2048. Credit the codes to

    https://www.geeksforgeeks.org/design-a-2048-game-in-javascript/

    1. Install a code editor like Visual Studio Code. If you already have one then just use yours. Choose the best one for your Operating Systems (OS). I’m using Windows for this tutorial.

    https://code.visualstudio.com/

    2. Create a GitHub account and make a public repository. You can choose or use alternative platforms that are able to host an HTML site.

    https://github.com/

    https://github.com/ddang37/ChargedMagazineGame2

    3. Clone this repository onto your local computer. There are alternative ways to do it. I recommend using GitHub Desktop which makes things easier. Follow the corresponding guide below if you are new to GitHub.

    https://docs.github.com/en/repositories/creating-and-managing-repositories/cloning-a-repository

    If you use GitHub Desktop:

    https://docs.github.com/en/desktop/adding-and-cloning-repositories/cloning-a-repository-from-github-to-github-desktop

    4. Open the local repository folder in your Code Editor.

    Create a HTML, CSS, and JavaScript file. Let’s name them game.html, style.css, and dynamic.js. You can change the names and have additional files for more complicated games.

    5. Write the codes into the files. HTML with elements, CSS with stylings, and JavaScript with animation and interaction. 

    For starters, you can search online for sample code and modify from there (make sure to credit the sources!). There are plenty of variants and implementations. You can also create your own!

    You can also fork from the original popular 2048 code:

    https://github.com/gabrielecirulli/2048

    The codes we are using is a much simpler implementation, but still difficult:

    https://www.geeksforgeeks.org/design-a-2048-game-in-javascript/

    6. If your codes are not original from scratch, make sure your game.html file is referring to the correct style.css and dynamic.js. 

    7. Save the codes. Double click the HTML file from file explorer, it should open a chrome site of your HTML game.

    8. When you are satisfied with the result, commit your changes to the online repository. You can do this multiple times, even after you publish the site.

    https://github.com/git-guides/git-commit

    If you use GitHub Desktop:

    https://docs.github.com/en/desktop/making-changes-in-a-branch/committing-and-reviewing-changes-to-your-project-in-github-desktop

    9. When you are ready to publish your code, go to your repository online. Go to Setting > Pages > Build and deployment > Branch, change None to main. An option for the folder will appear, just keep the default. Click Save.

    10. After a few minutes the page will go live. It will show up at the top under GitHub Pages.

    11. Click on the URL or Visit site. Add the extension of the HTML file name and the game will show up!

    https://ddang37.github.io/ChargedMagazineGame2/game.html

    For this 2048, the game do not autogenerate a tile of 2 or 4 upon making a move, but rather based on time. The random generated tiles can be 2, 4, 8, or higher based on the current tiles on the board. This make the game much harder to win.

    Fun fact: If you left this game alone, except for sliding, the game could play by itself!!!

    [iframe src="https://ddang37.github.io/ChargedMagazineGame2/game.html" width="1000" height="600" ]

    Note: The website might take up hours to update if you commit new changes after publication. If CSS stylings are not working like it did locally, double check if there’s any Chrome extension blocking it. If the website takes forever to update, try making the repository private and then public again. Refer to GitHub information sites if otherwise.

    https://docs.github.com/en/pages/getting-started-with-github-pages/github-pages-limits

    References:

  • Escape the Elements: How to Create a Science-Themed Escape Room

    Escape rooms are a fun way to bond with others and put your critical thinking skills to the test! An escape room is a game where people are ‘locked in’ a room and must find a way out by finding clues and solving puzzles (Cambridge Dictionary, 2025). Escape rooms are popular because they are wonderful social bonding experiences where teams of people must work together to get out of the room.

    In the past few years, several schools and universities started using educational escape rooms as an alternative method to teach students different subjects, ranging from math, history, science, and other subjects! One study had 62 students in Spain learn mathematical topics through an escape room model and found that it reduced learning anxiety while increasing motivation and learning achievement (Fuentes-Cabrera et al., 2020). Another study had 528 elementary school students go through either a virtual escape room or other digital game-based learning activities and found that the students preferred the digital escape room because it lead to higher collaboration and stronger motivation to learn among the students (Vidergor, 2021).

    During my time at Georgia Tech, I’ve created two separate science-themed escape rooms from scratch with my friends and ran them both four times collectively. We had a lot of fun, and I learned so much about escape rooms – both making and playing them – in the process. I think escape rooms are a wonderful way for people to learn and apply their knowledge while being in a fun environment and bonding with people around them who share the same interests. There are many escape room templates online that you can use, but I want to make this guide if you want to make your own customizable escape room that tailors to your audience. In this guide, I’ll share some tips about making an escape room from scratch as well as some of my own experiences.


    Step 1: Choose a Theme and a Storyline

    Choose a theme based upon your intended audience. For example, my intended audience was college students who were in different science majors, so I incorporated elements (pun intended) from as many science fields as I could. If you are making an escape room for your biology class, make the room biology themed.

    Once you have a theme, create a storyline about why they are in the room. Maybe an evil scientist is creating a formula to destroy the world, and they must figure out the formula to stop them! Maybe the room is part of a colony on Mars that lost power and communication with Earth and the crew (participants) need to work together to restore the colony’s original functions so they can get back, but they must do it quickly because oxygen levels are depleting fast! The more interesting the storyline, the more interested your players will be. The sky’s the limit with your storyline but ensure that it matches with the theme of the room and add in a specific reason for the time limit (e.g. oxygen levels depleting within the hour on the Mars colony). Both escape rooms I held involved an evil magician who performed strange alchemy experiments, and the participants were playing as detectives who got trapped inside the evil magician’s hideout. Be as creative as you want with your storyline!


    Step 2: Determine a Game Flow Plan

    Choose how you want your puzzles to be organized. Do you want your puzzles to be connected to each other linearly or do you want multiple puzzles that can be solved separately from each other?

    I organized my puzzles into 5 puzzle sets with a final number at the end of each set. Each set had 3 to 4 puzzles that had to be solved in order but sets themselves could be solved independently of each other. For example, puzzle A1 had to be solved to unlock puzzle A2, but puzzle B1 could be solved without needing to solve A1. For the participants to escape, there was a final door code (found by writing all the numbers at the end of each set in a specified order on a whiteboard).

    It’s up to you on how you want your puzzles to be organized, but it’s beneficial to have each puzzle lead to something else (unless it’s a red herring puzzle in which it will lead nowhere).


    Step 3: Design Puzzles

    Once you have your puzzle outline down, it’s time to make the puzzles! There are a variety of puzzle types you can choose from. This list below is not extensive, but these are some of the puzzle types I used:

    • Hiding secret messages in documents (letters, posters, newspaper clippings, etc.) by using CAPTIALS, bolding, italicizing, and underlining specific letters or words
      • If you want to make it more complex, you can use bolding and italicizing to create two different messages – one is a real message that leads to the next puzzle while the other message is a funny red herring but doesn’t lead to anything.
    • Locking items in boxes, cabinets, etc.
      • You can buy lock boxes from a store or you can punch holes into cardboard boxes and attach combination locks to them.
      • There are a variety of locks you can use: number locks, letter locks, among others.
    • Ciphers
      • Caesar cipher (each letter is shifted by a fixed amount)
      • Morse code (using dots and dashes for letters and numbers) – requires a key
      • Atbash cipher (alphabet is reversed; A becomes Z, B becomes Y, etc.)
      • Braille (using raised dots or gem stickers to form numbers or words) – requires a key
      • Pig Pen cipher (alphabet letters are replaced with parts of a grid or by a set of symbols) – requires a key
    • Putting a sequence of events in order which reveals a code
    • Counting the number of colored objects drawn on a board to reveal a code

    There are many other puzzle methods you can use, but keep your intended audience in mind as you determine which puzzles to use. Try to avoid making your puzzles too complex or else your audience may not understand how to solve them which can lead to immense frustration.


    Step 4: Determine How to Integrate Puzzles into Room

    Once you make the puzzles, determine where you want to hide them! They can be hidden in locked places (boxes, cabinets, etc.) or they can be hidden in plain sight (e.g. a letter with a hidden message sitting on a table in the open). I recommend writing down the locations of each puzzle in your answer key, so setting up the room will be much easier (and you can find puzzles that you’ve hidden away in case you forget).

    If your puzzles are interconnected with one another, determine how you’ll ensure they must solve the previous puzzle before continuing to the next one. I usually locked up the next puzzle in the sequence and participants would have to solve the previous puzzle to get the code for the lock.

    Additionally, use props to bring the room to life! Use props related to the theme and storyline you’re doing for your escape room, and they don’t have to be expensive props. You can either use things you already have, make props, or buy props to bring the escape room to life. The more props you use, the more immersive the experience will be!


    Step 5: Test and Adjust Puzzles (If Possible)

    It is beneficial to test your puzzles and/or your entire room with people who are not doing the escape room (if you can) prior to your official date. A puzzle that is easy for you to understand may be difficult for someone else to understand, so testing out your puzzles ensures that the puzzles are not too complicated for your intended audience.


    Step 6: Run the Escape Room!

    You’ve done all the hard work in making the escape room, so now it’s time for the big day!

    Some tips from my experience:

    • Make sure to either have an answer key or have the answers memorized in case the participants need help
    • Start setting up early! Make sure to have at least an hour or two hours for set up based upon how complex the room will be (more puzzles and decorations/props = more set up time)
      • Remove as many items as you can that are not related to the escape room to avoid confusion
    • Make sure to state the rules prior to participants starting the escape room (These are the ones I used but you can add more)
      • There is only key or code per lock
      • Don’t break the ceiling, walls, or any delicate furniture/technology
      • Don’t stand on the furniture
      • Don’t need to dig through the trash cans
      • You write using paper/pencils or whiteboards
      • They have X amount of time to escape (usually 45-60 minutes but ours lasted 2 hours because we had a complex set up)


    Making an escape room can be daunting, but it’s an amazing adventure at the end of the day! It’s a rewarding experience for players and can be a fun educational experience where participants can learn while bonding with their peers.

    Thanks for reading!


    Bibliography

    Cambridge Dictionary. (2025, January 29). escape room. @CambridgeWords. https://dictionary.cambridge.org/us/dictionary/english/escape-room

    Fuentes-Cabrera, A., Parra-González, M. E., López-Belmonte, J., & Segura-Robles, A. (2020). Learning Mathematics with Emerging Methodologies—The Escape Room as a Case Study. Mathematics, 8(9), 1586. https://doi.org/10.3390/math8091586

    How to Make an Escape Room at Home: DIY Guide. (2024). Escapely. https://escapely.com/how-to-make-an-escape-room/

    Vidergor, H. E. (2021). Effects of digital escape room on gameful experience, collaboration, and motivation of elementary school students. Computers & Education, 104156. https://doi.org/10.1016/j.compedu.2021.104156
  • The Magical Goo!

    Oobleck recipe

    Have you ever heard of Oobleck? I first discovered this substance, a mixture of water and cornstarch, while doing a science experiment in elementary school. Oobleck defies the laws of nature, or at least Newton’s laws. Though it initially appears like a liquid, when you apply pressure, it turns into a solid. How can a substance be both simultaneously?

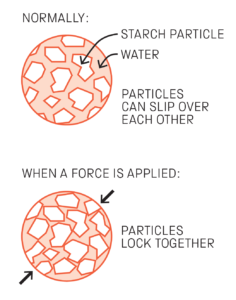
    The reason is because Oobleck is classified as a non-Newtonian fluid, meaning that it does not follow Newton’s law of viscosity. Viscosity is a property that describes how a fluid flows, or more simply, how thick or thin it is. When a fluid’s viscosity is constant, it is called a Newtonian fluid. Most fluids fall under this category. However, Oobleck is one of the few exceptions. Its viscosity is depended on the amount of force applied to it. Known as a shear thickening fluid, it appears thicker as you physically manipulate it. This behavior is explained by the structure of cornstarch, the main ingredient in Oobleck. Cornstarch particles are long and thin, when you mix it with water, the faster you move it, the more tangled the particles become, thus “hardening” and imitating the solid state. The increased amount of friction created through motion also causes increased resistance of the mixture to flow. It is important to note that Oobleck is a suspension, not a solution. This means that the cornstarch does not dissolve in water. Instead, it is suspended in the liquid. If you let it sit in a glass for a while, the cornstarch will separate from the water and settle at the bottom.

    Oozing oobleck activity - Science Museum Group Learning

    Aside from being a fun science experiments for students to enjoy, Oobleck has other potential uses. There have been cases of several patents for the industrial use of the material. One proposed usage was for a system to fill potholes. Permanently fixing potholes involves economic and seasonal considerations. One alternative was to use bags of Oobleck. When the bag is placed in the hole, the Oobleck acts as a liquid to fill the space. When a car drives over it, it hardens, preventing damage to the vehicle.

    Check out this video by Todd Scott to see the concept in action! 

    Another use was for a gear damper. Gear dampers are used in cars to control the movement speed of trays and glove boxes. Oobleck could be used to ensure that these components open when used normally but remain closed when a great force is applied, like in a car accident.

    Experimenting with Oobleck is a great way to explore the properties of non-Newtonian fluids. Though they are typically not mentioned in your typical science class, they exists in our everyday lives. Some common examples include Ketchup, paint, and toothpaste. Though, unlike Oobleck, these fluids become thinner when agitated. They are known as shear thinning fluids. In addition to serving as a fun science experiments, substances like Oobleck can also have practical real world applications!

    Sources

    Lima, E. (2020). Studying the Oobleck with video-analysis. IOPscience. https://iopscience.iop.org/

    Oobleck. Imagination Station.

    https://www.imaginationstationtoledo.org/education/diyactivities/Oobleck#:~:text=Oobleck%20is%20a%20suspension%20of,until%20you%20release%20the%20pressure.

    Oozing oobleck activity – science museum group learning. Science Museum Group. (2022, August 15). https://learning.sciencemuseumgroup.org.uk/resources/oozing-oobleck/

    Ralphs, A.(2023, August 4). Oobleck recipe. One Hundred Toys. https://www.onehundredtoys.com/oobleck-recipe/

    The IP Bloggers. (2018, February 20). Surprising uses for Oobleck. Industrial IP. https://www.industrialsip.com/2018/02/surprising-uses-for-Oobleck.html#:~:text=When%20the%20bag%20is%20placed,necessary%2C%20and%20is%20environmentally%20benign.


  • Using Rap Music to Help Students Learn Critical Science Topics!

    I don’t know about you, but I have always had a hard time learning science topics. Many of them are extremely abstract, and theoretical, and I always felt that the professor went so fast in class that I barely had time to keep up and ask questions. I would go home, feeling nervous and tense after class, and frantically search for a YouTube or Khan Academy video. However, when I started the video, I quickly found myself feeling disengaged, bored, and tired. I would spend hours on a video, just to find myself as confused as when I started watching the video. Initially, I thought it was just an issue with my understanding of that particular video, and I would try different videos on YouTube. Nevertheless, a point came when it just felt like every video was not working out, and that I was confused no matter what I did. I felt as if there was nothing I could do, and that I was just stuck not understanding the information and hoping for the best. Plus, with all my other classes, and all the tests I had plus my commitments outside of class, I felt extremely crunched for time and did not feel like I had the time to keep looking for resources. But something pushed me to try something new. I had heard of these parodies of songs that people used to learn complex topics before. Seeing that I was a big fan of rap music, I looked for rap music parodies. I was so pleasantly surprised by what I found! Suddenly, I actually felt engaged in what I was watching that I actually absorbed the information really effectively. This inspired me to try writing rap songs, myself, to teach science to kids and I decided to post rap lyrics, inspired my Migos that I have come up with so far to teach the processes of the circulatory system and how the heart pumps blood to kids. It goes as follows:

    Rhythm drop, heart stop

    Right A (atrium) pump blood to the V (ventricle) top

    Get that O2 from the lung, lung lung

    Come back down to the Left A, yeah

    We go from O nothing to something now

    The heart is really functioning wow

    Left V so strong, circulating

    Aortic valve kick starting and…

    Myocardium pumping and pushing,

    Valves open and blood flowing

    Valves close preventin the leaking

    We got normal function of heart (ay)

    Myocardium pumpin and pushin,

    Valves open and blood flowin

    Valves close preventin the leaking

    We got normal function of heart (ay)

    Looking back, I have two hypotheses about why students learn significantly better when listening to these raps than using conventional methods. For one, many people in the Gen Z generation are into rap music. They like the beat, melody, and the flow of the words. Therefore, when they listen to a rap song, even if it is about a science related topic, they are significantly more likely to be engaged and interested as they get hooked into the music and focus less on what the song is actually about. At least from experience, when you try to teach someone a topic in a way that they can relate to and something in their life, like a hobby or an interest that they can personally connect the topic to, they are much more likely to be motivated and interested in learning. My second hypothesis is that listening to rap music increases their interest in the topic, and many research papers have demonstrated that when people are more interested in something, they are likely to retain much more of the information that they learn about it. For instance, one study that looked into the quantity of information that students remembered and the durability of their memory, regarding that information when they learned it in a way that was interesting to them vs. using a conventional method produced some results that were extremely insightful and fascinating. For instance, “The researchers found that the students who were interested in what they learned gained way more because they were more likely to go to class, pay attention, and even wanted to take more courses in that given area”(Interest Matters: The Importance of Promoting Interest in Education). This makes sense, from my personal experience, as I looked forward to going to classes where I knew that I would be entertained and I would have fun, while I dreaded and would not look forward to going to classes where I knew that I would be bored and that I would not be engaged. Similarly, another study found that “Experiencing situational interest, like seeing a brush being used to paint in art class can greatly increase engagement”(Interest Matters: The Importance of Promoting Interest in Education). This is one of the principles that I use in the raps that I create, as I try to include applications of how these topics apply to real life in the lyrics to increase peoples’ attention. I have also experienced this personally, as I was more engaged in my Biomechanics class, when I saw how what I was learning could be applied to the motion of joints in real life. What I do not understand is that with so many studies pointing to this finding, why have we not implemented this learning model in high schools and colleges across the country? What are we waiting for? Why do we keep using old methods, when we know their success rates are limited? It is high time to stop going with the conventional, tried and true method, and have the courage to try something new. Not only will it make students and professors, alike, happier, but students will actually retain more knowledge that will help them in their future careers and, more importantly, their life! If you are a professor reading this, I sincerely hope you have the courage to give this a try in your class one day! I guarantee you that you will not regret it!

    Source:

    Harackiewicz, J. M., Smith, J. L., & Priniski, S. J. (2016). Interest Matters: The Importance of Promoting Interest in Education. Policy insights from the behavioral and brain sciences, 3(2), 220–227. https://doi.org/10.1177/2372732216655542

  • How to breathe FIRE! (Don’t Try This At Home!)

    If you clicked on this link, you may be, like me, a bit of a pyromaniac. Unfortunately for us, playing with fire is quite dangerous, so…

    Disclaimer: The activity of breathing fire is extremely dangerous and should only be attempted under the strict supervision of a trained professional. The techniques and practices involved can result in serious injury or even death if not performed correctly. The information provided in this article is for educational purposes only and should not be used as a guide for attempting the activity. The author, Charged Magazine, and the Georgia Institute of Technology do not endorse or encourage the practice of breathing fire and assume no liability for any actions taken by readers as a result of this article.

    With all that out of the way, let’s talk about fire breathing. As awesome as it looks, fire breathing is undoubtedly dangerous. To lower the risk of injury, professional fire breathers use of fuels with a high flash point of at least 50° Celsius. In scientific terms, flash point is the lowest temperature that a substance will naturally evaporate into a flammable gas. One of the most popular fuels among professionals is paraffin oil, which is a highly purified lamp oil. Paraffin oil is ideal as it has a fairly high flash point of ~90° Celsius.

    One should absolutely avoid using any fuel with a lower flash point. Especially dangerous fuels include:

    • Ethanol – Ethanol can be absorbed into the bloodstream without ingestion, leading to unwanted intoxication (drunk + fire = bad!)
    • Methanol – Methanol can be absorbed into your body via a variety of methods, and can lead to blindness and neurological disorders. Fun fact, methanol is often a natural byproduct of alcohol distillation, and a lot of care is usually taken to make sure none of it gets into the final product. It’s also why distilling alcohol is so dangerous!
    • Fuels with very low flash points (e.g. butane, propane, etc.) – These fuels are prone to a build-up of flammable vapors in the oral cavity, which can combust inside your mouth (yikes!)
    • Common fuels (e.g. gasoline, kerosene, etc.) – Fuels like gasoline and kerosene often contain carcinogens and additives which can lead to health complications, and are much easier to ignite (which is bad.)

    Now that I’ve hopefully scared you into not trying this on your own, I’ll tell you about my preferred method of fire breathing. Unlike all of the examples outlined above, my favorite – instead, I like to use cornstarch. As crazy as it sounds, your typical supermarket cornstarch can be used to breathe fire! Although the flame isn’t quite as spectacular as a liquid-fuel flame, cornstarch is a (relatively) safe option as the powder doesn’t ignite unless it is suspended in air, so the flame has a hard time reaching your mouth after igniting.

    The process is super simple:

    Step 1: Safety. Make sure you are outside and away from anything flammable. Make sure it isn’t windy, as the wind can blow the fire back into your face (I’m speaking from experience here.) A fire extinguisher and a way to call 911 is a must. Water can be nice too (to rinse out your mouth.)

    Step 2: Put a spoonful of cornstarch in your mouth.

    Step 3: Light a lighter or torch.

    Step 4: Blow!

    If everything has gone to plan, congratulations! You are still alive, and your friends are probably mildly impressed with the small fireball that’s come out of your mouth.

    So there you have it! Have fun not trying this at home!

  • Behind the Baking: Leavening

    Introduction

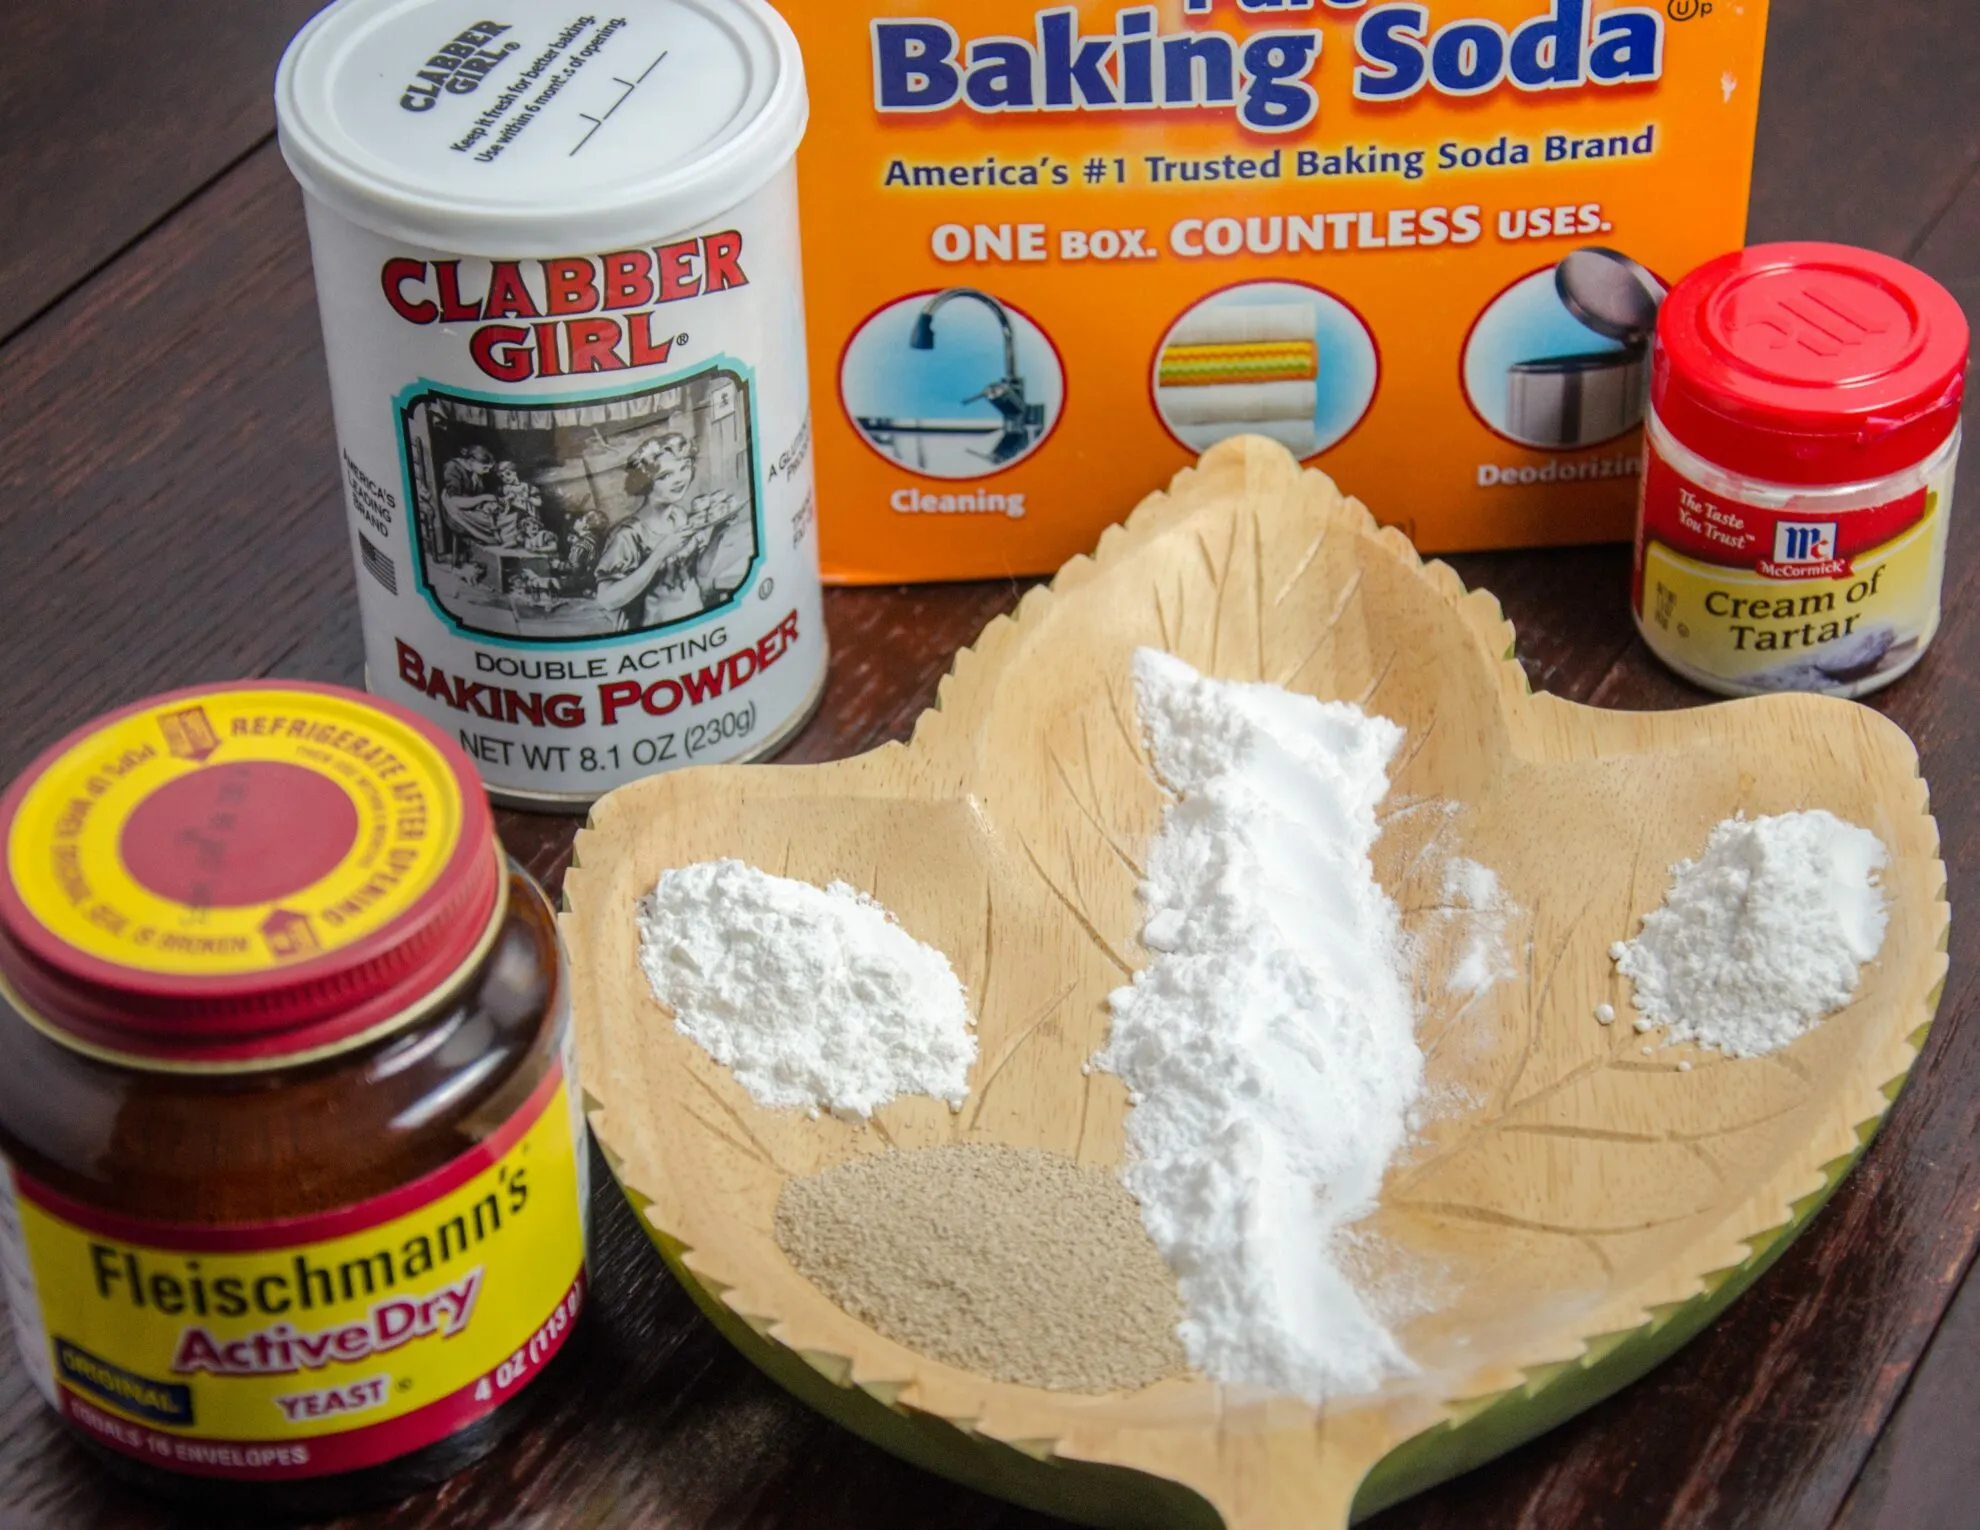
    Welcome to the second installment of my Baking Science series! This time, I’m putting a variety of leavening agents to the test to see how they perform based on taste, texture, and overall look. I will be baking three loaves of bread: one using yeast, one using baking soda, and one using baking powder. I predict that the loaves of bread will all vary greatly from each other, but I am especially interested in finding how the baking soda and baking powder bread differ since a majority of the general population cannot distinguish the two.

    What goes into baking beautiful bread?

    Most kinds of bread come together with only six ingredients: flour, oil, water/milk, a leavening agent, sugar, and salt.

    What’s a leavening agent and how does it work?

    The word ‘leavening’, as defined by Oxford Dictionary, is a substance used in dough or batter to make it rise, such as yeast or baking powder. Without this key ingredient, it would be impossible for the bread to rise, resulting in a flat cracker. In order to create a good ole’ sturdy loaf of bread, a couple of essential chemical reactions need to take place in the oven. The first ingredient, flour, contains two proteins called gliadin and glutenin; when combined with water, these proteins transform into gluten. The chemical makeup of gluten shows that the molecules are chained together to create long chains- this allows the bread dough to be elastic and stretchy. This is also why the longer the dough is kneaded, the more elastic it becomes. The dough’s stretchy quality is super important in achieving the end loaf because of the way the leavening agent works. The agent causes a bunch of tiny gas bubbles to form in the dough either before or while it is in the oven. Ever watched a baking competition and heard the cast talk about ‘proving’ their doughs? I know I have! The proving process involves letting your dough rest and rise before it is put in the oven to bake. This step is integral when using yeast, but not necessary for baking soda and powder since they do their work in the heat of the oven.

    Experiment

    Three loaves. Three agents. One winner. Just kidding, but I will include which bread I enjoyed the most at the end!

    Round 1: Yeast

    Recipe: https://butterwithasideofbread.com/homemade-bread/

    Round 2: Baking soda

    Recipe: https://sallysbakingaddiction.com/no-yeast-bread/

    Round 3: Baking powder

    Recipe: https://www.recipetineats.com/sandwich-bread-without-yeast-quick-easy/

    Observations and Opinions

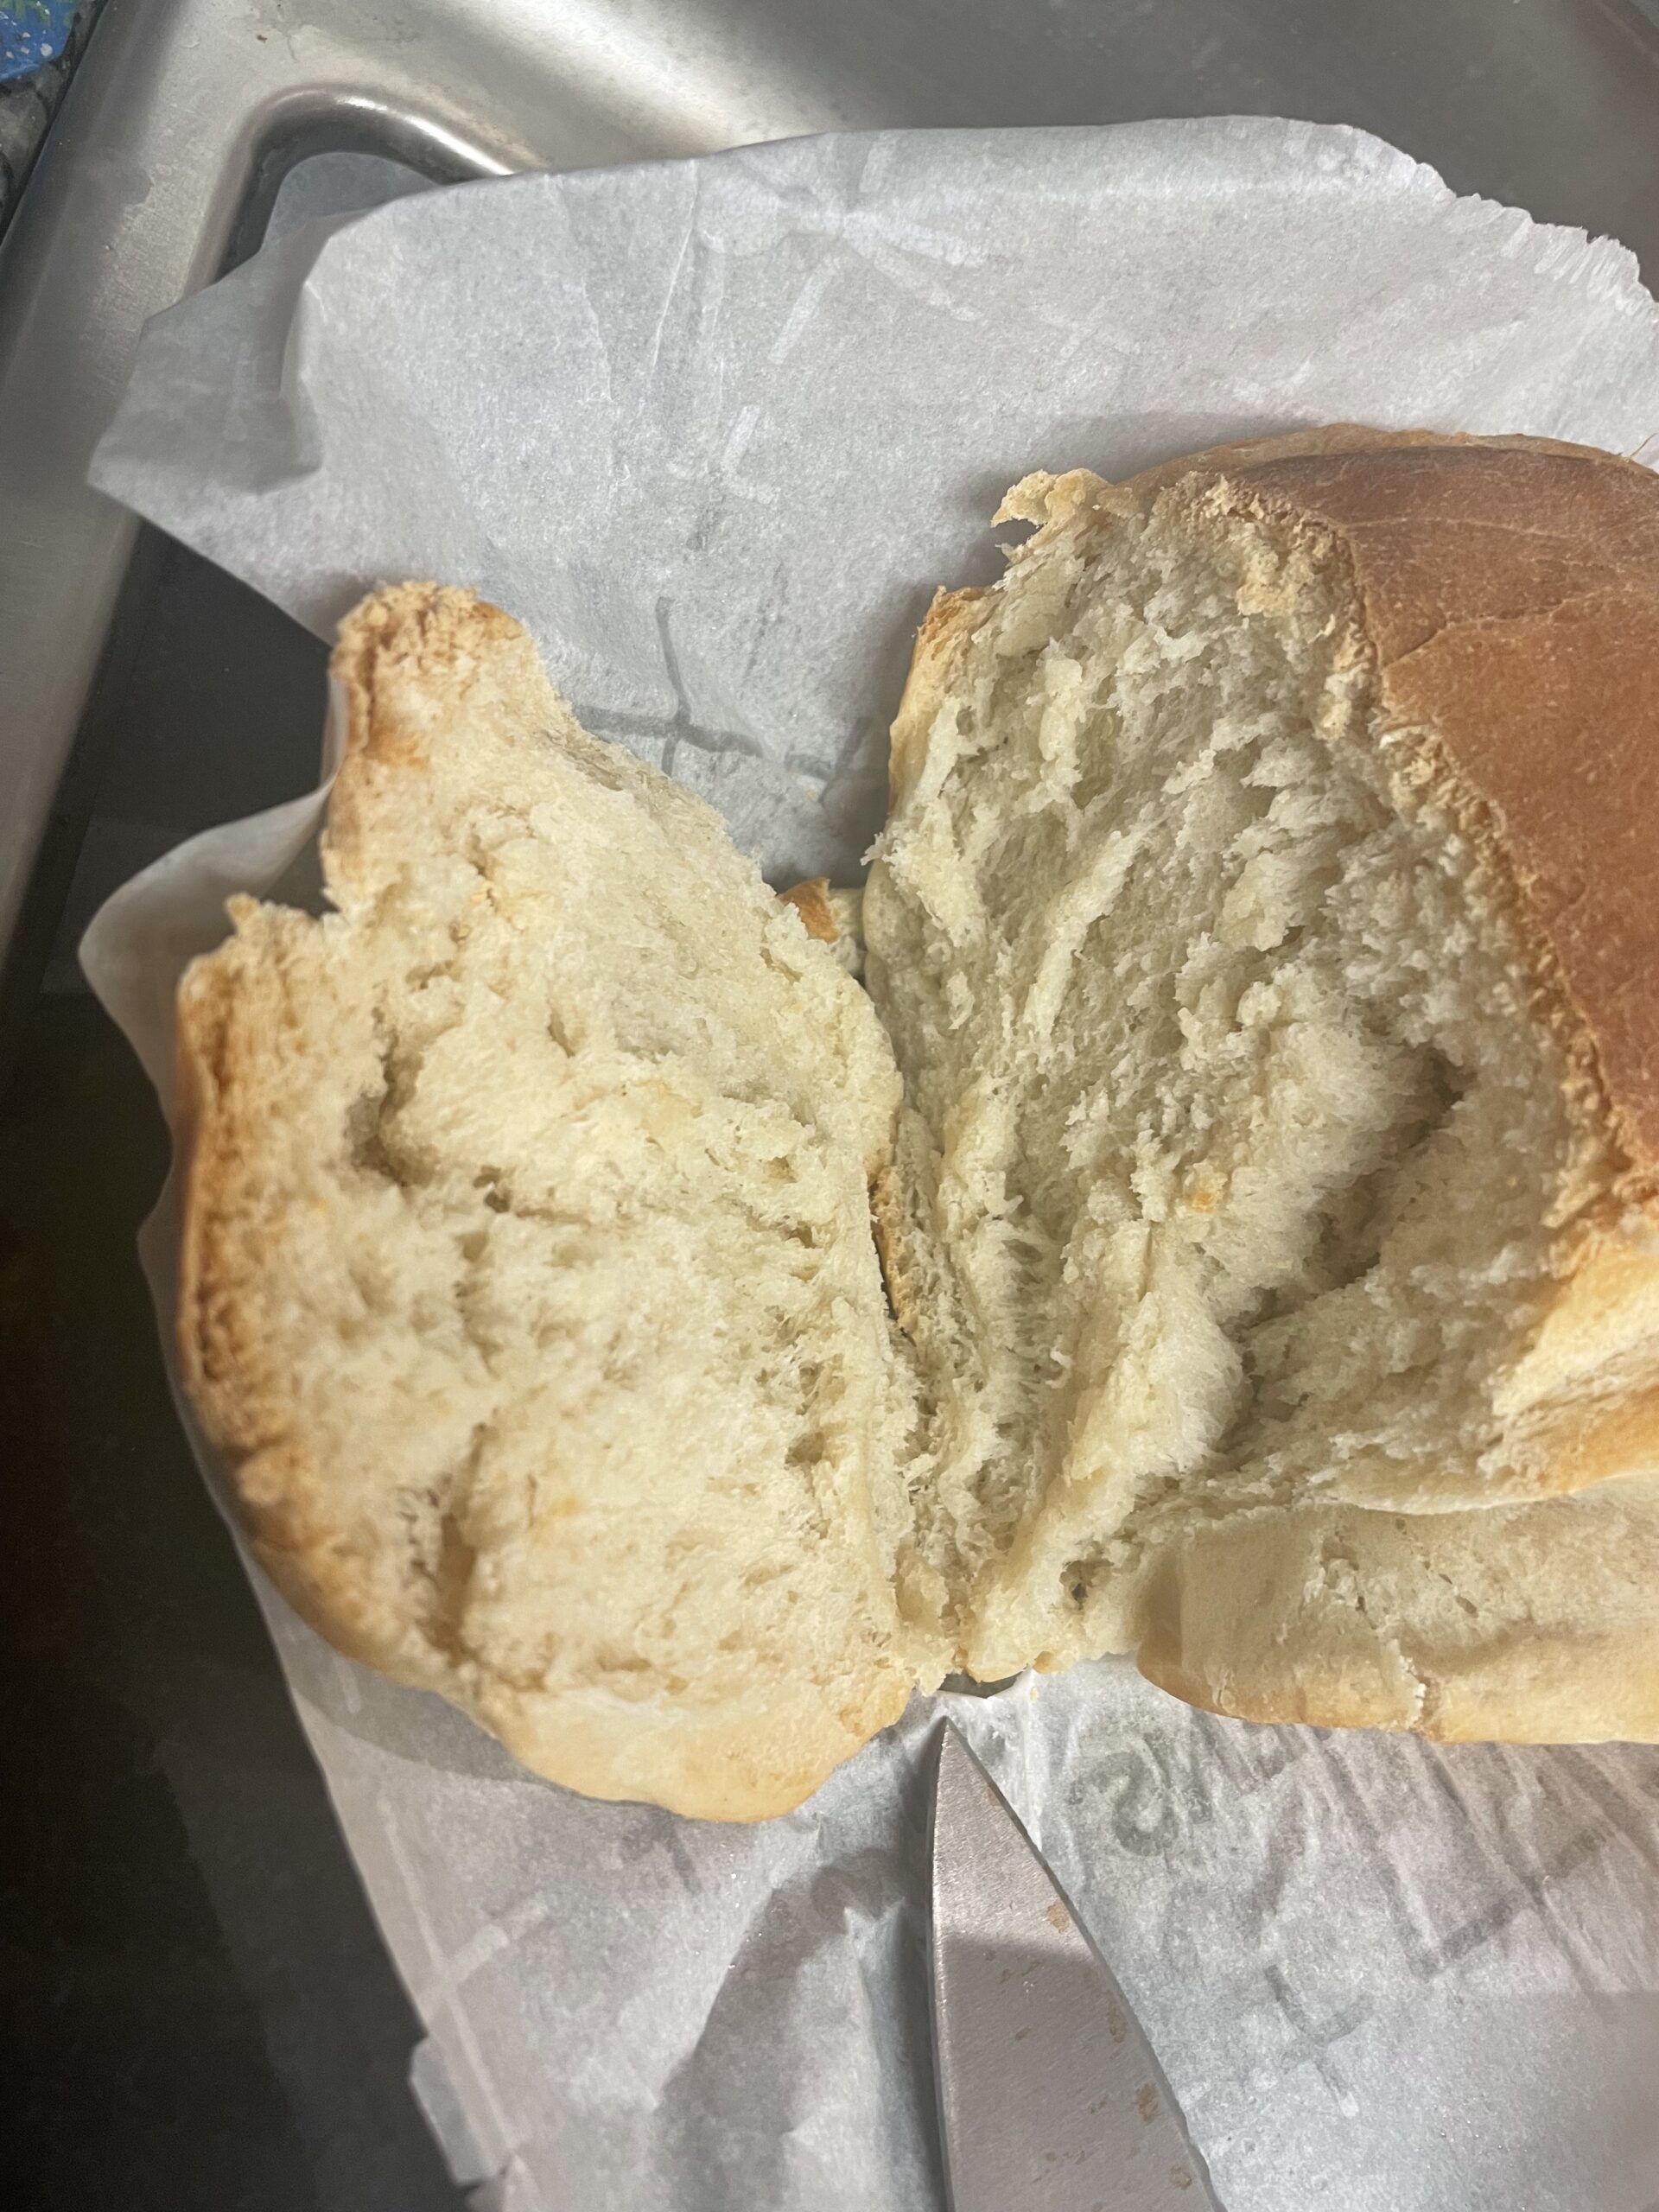
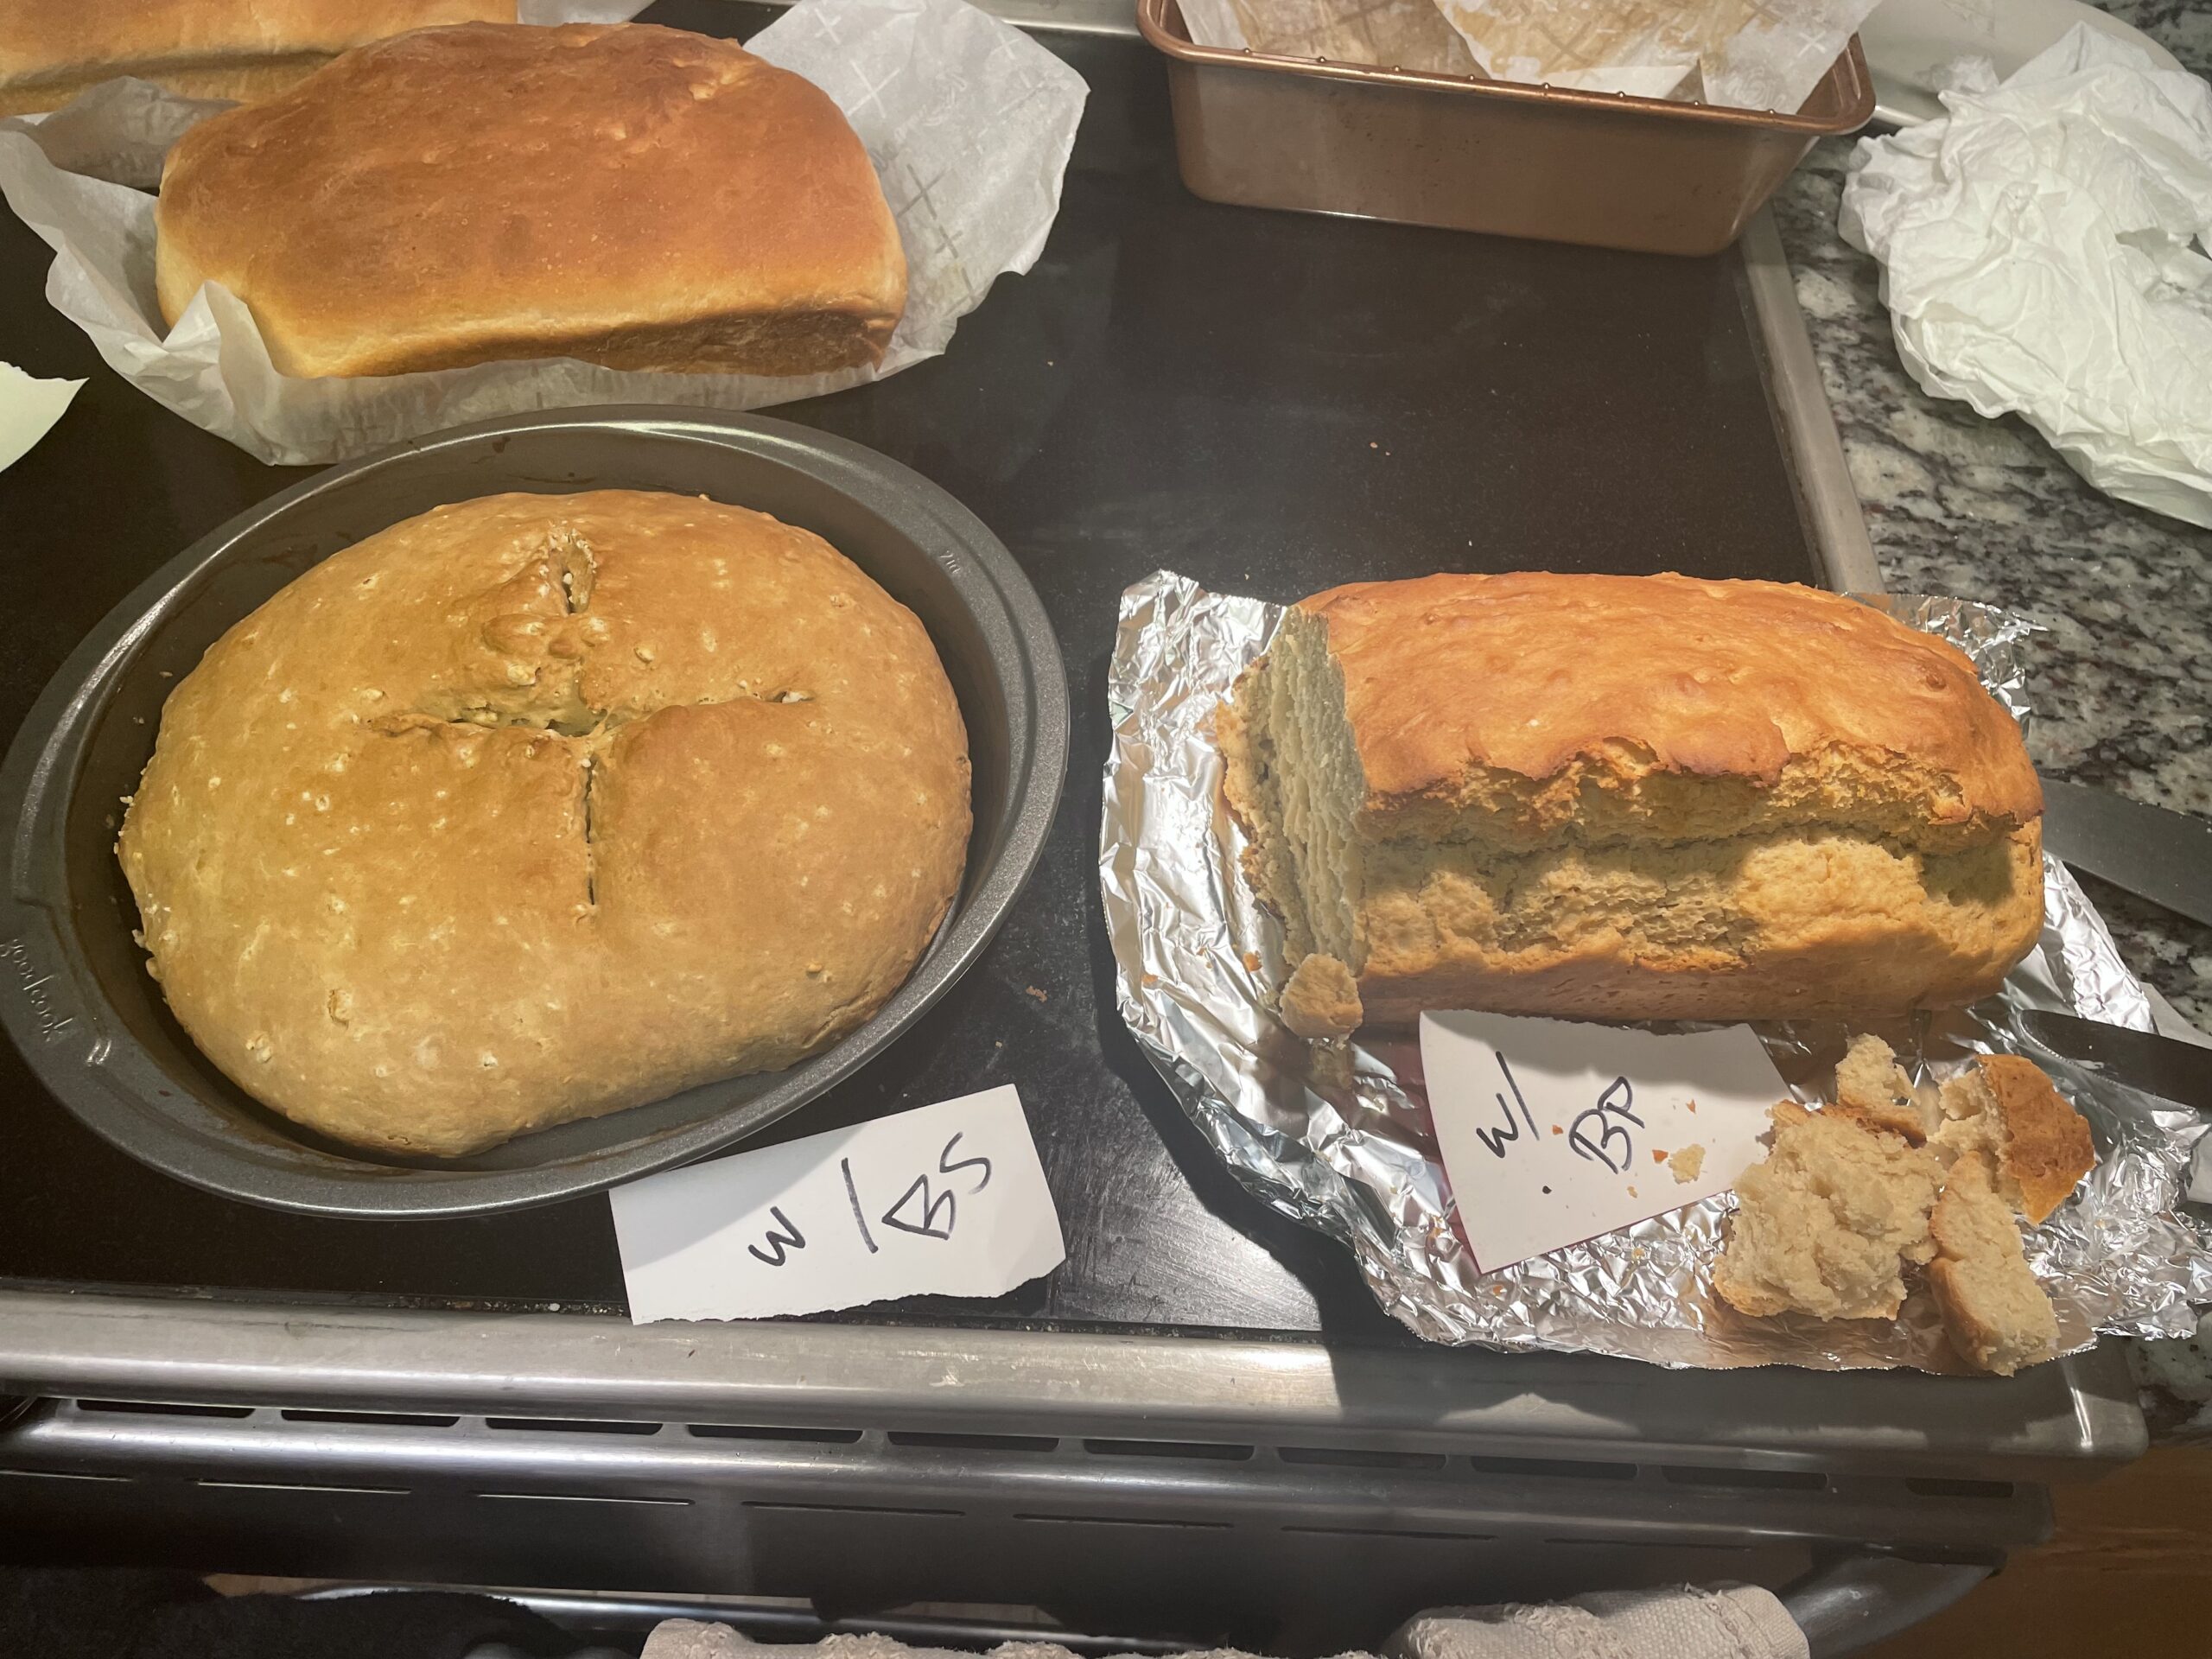
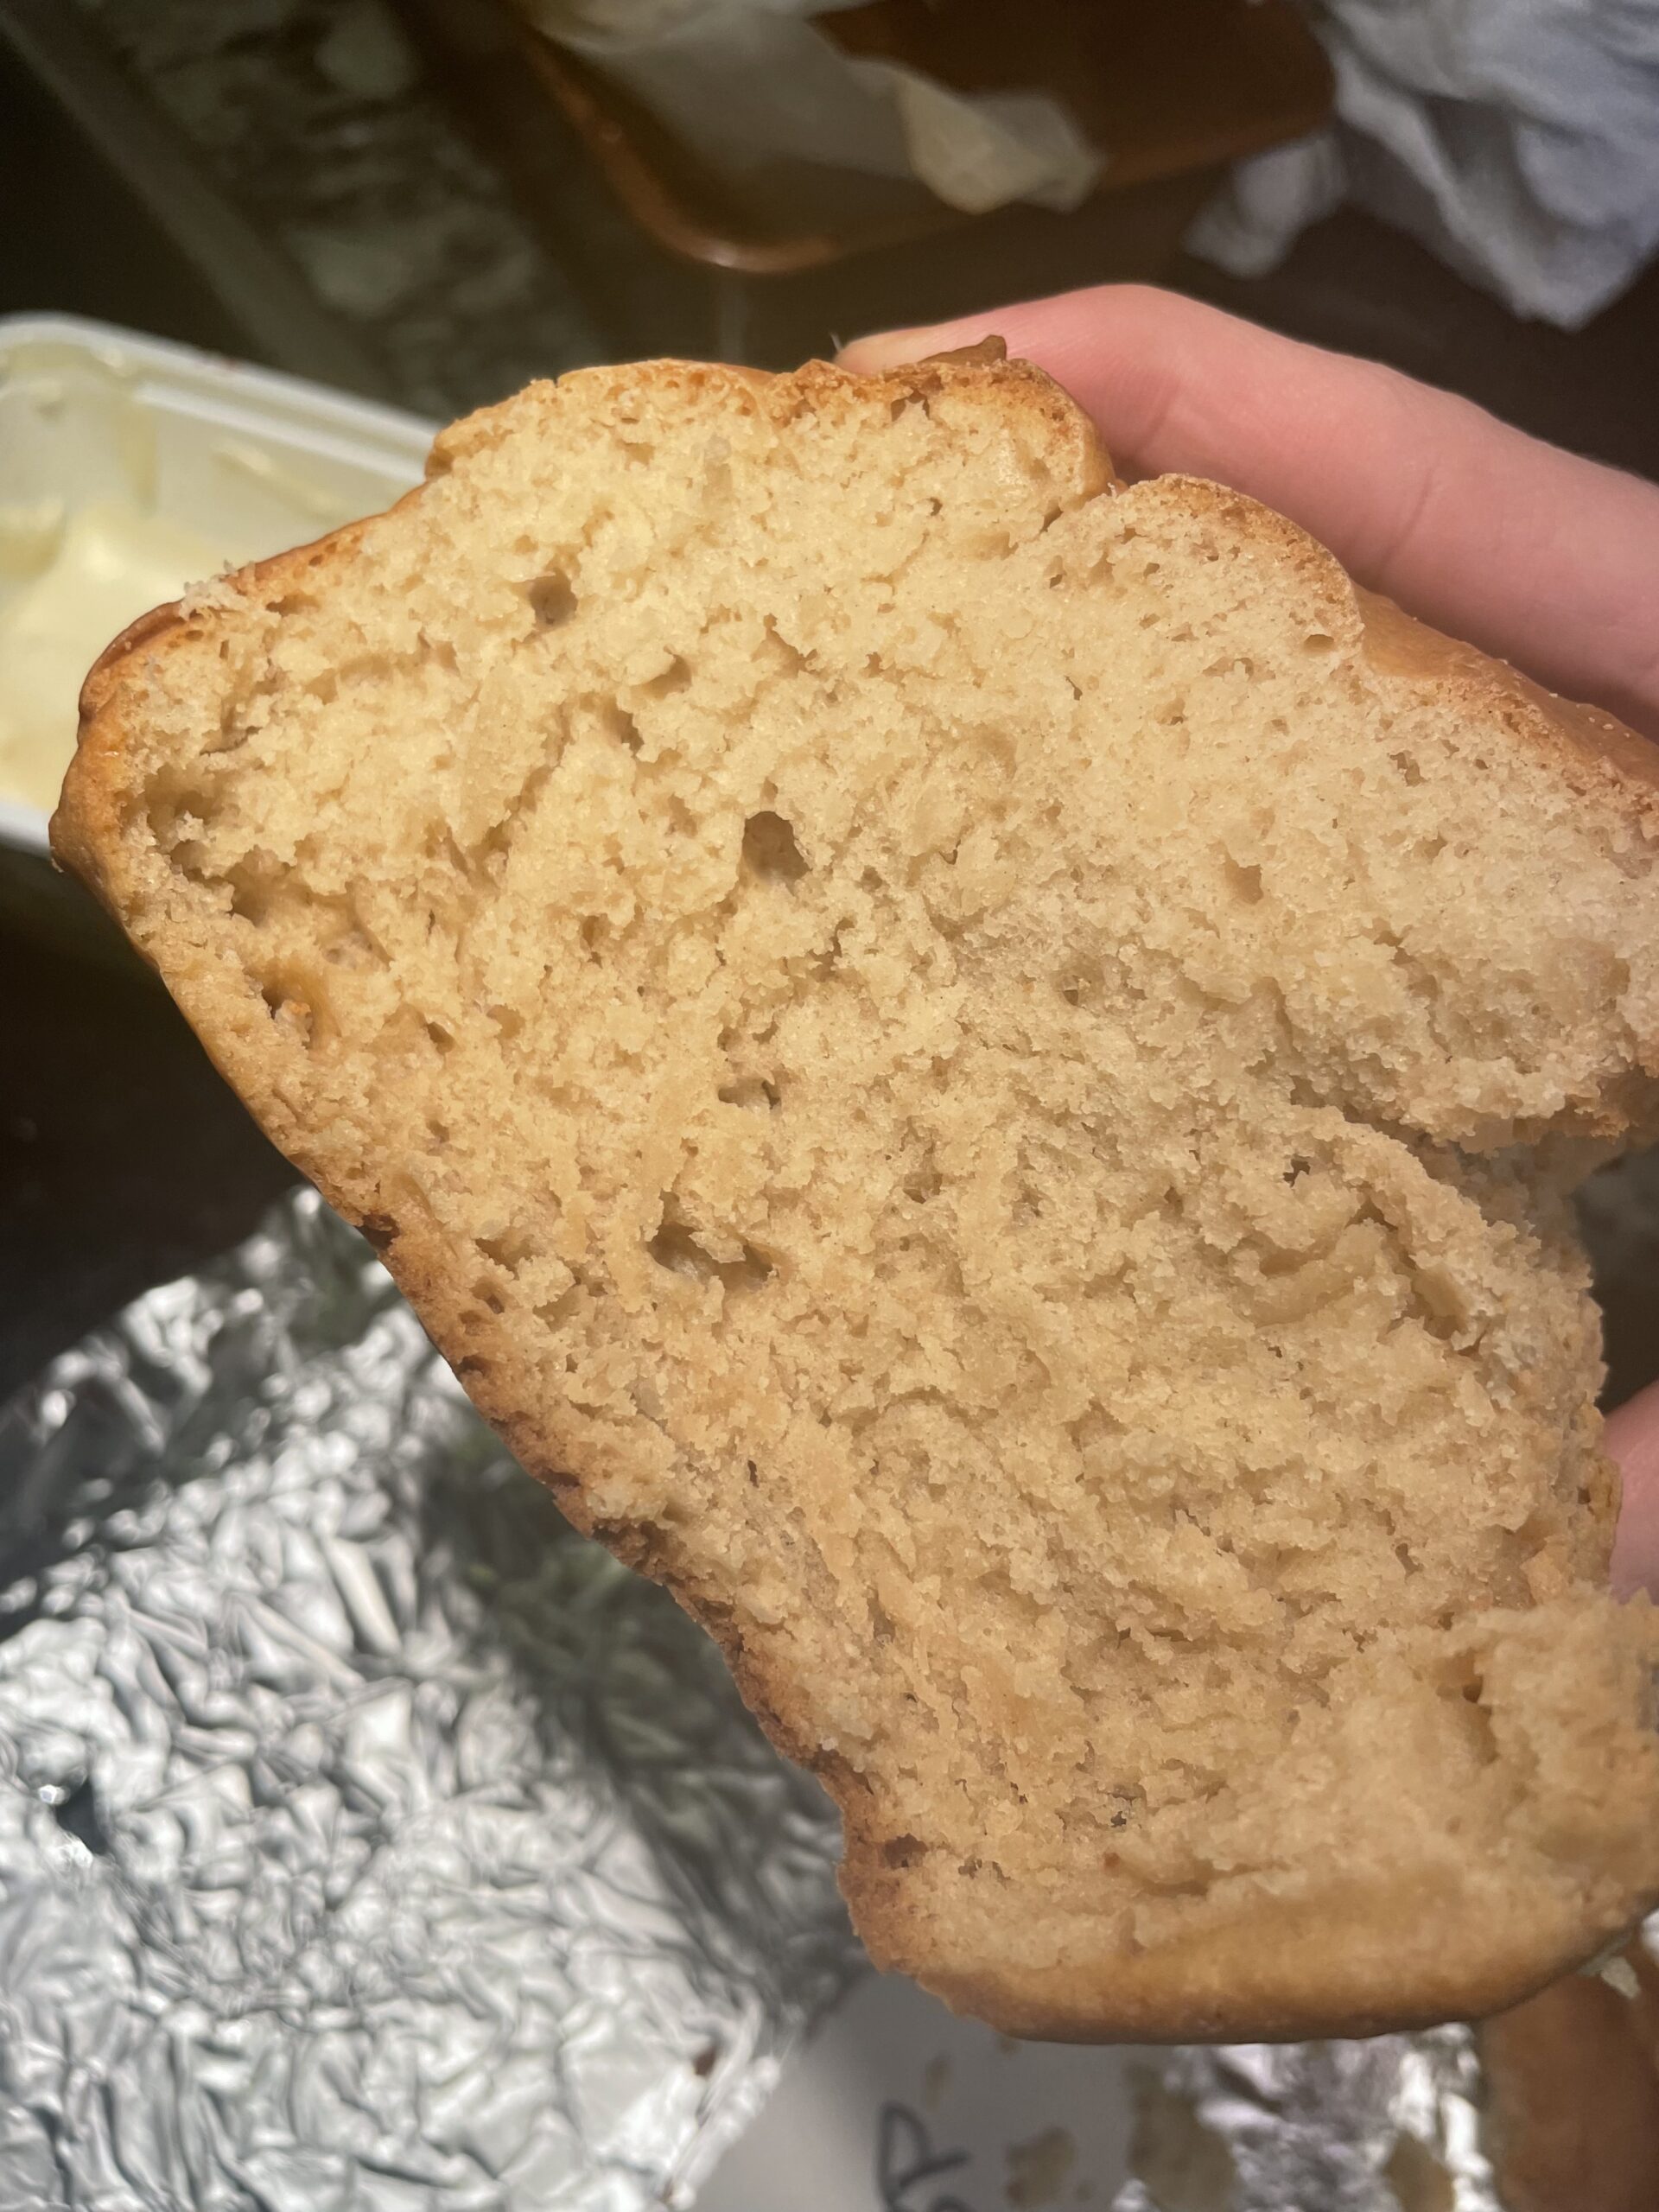
    Unsurprisingly, the bread that came out the best, in my opinion, was the yeast bread. This comes as no surprise because most of the breads that are sold in stores and that people generally think of are made with yeast. It’s hard to beat lightweight, airy feel of the yeast bread crumb. The baking soda bread was also delicious, but much much denser than the yeast bread. The baking powder bread was the weirdest- it was super heavy and stodgy and just not good. That might have been due to my error though, I may have overmixed it or kneaded it too much. The baking powder bread was so tough I didn’t want to cut a slice and eat it.

    Final Thoughts

    My favorite bread of the three was the yeast bread! The other breads honestly did not stand a chance against the tried and true yeast bread and I now know that I do not care for soda bread much. I would advise against making bread with baking powder, it was so hard for me to get it right but maybe some practice could improve it. Overall, it was super fun to test out these leavening agents and see them in their rising action.